Pumpkin Carving Ideas

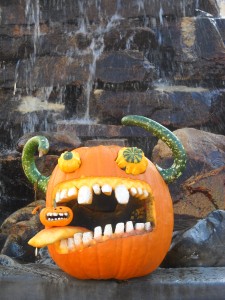
HOW TO CARVE A PRIZE WINNING JACK-O’-LANTERN  

50% off till Halloween

Big mouth pumpkin with horns and crazy eyes.

I’m very happy to announce TWO things  today. Our new video course staring me, Wayne Andreason, How to Carve a Prize Winning Jack-O’-Lantern, and even though it is only $9.99 we are offering it at half price through October, Happy Halloween.

50% OFF? How so? Promo code pmpkn

You will have to go here to our secret promo code page that is truly hard to find with out a link. I have always have a tough time finding it every time I try to link to it or send it to someone and I work here. And type in the promo code pmpkn that’s all lowercase by the way.

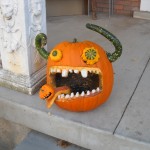
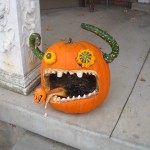
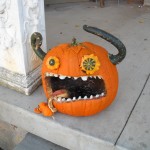
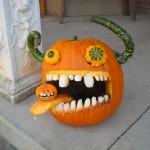
Could You Just Carve a Cool Pumpkin Like This without buying the course?  

An artistic cat such as your self probable doesn’t NEED to sit and watch me carve this thing. You could pretty well look at it and just do one yourself, or one like it for that matter, BUT if you like that step by step instructional video courses that we offer then by all means, purchase this one while it is only $5 and give it a look.

Why I carved this great pumpkin.

Last year my mother-law, who lives in my home unfortunately, (unfortunately for her of course, did you think I was complaining?) had this BIG Halloween Work Party and the highlight was their Big old Pumpkin Carving Contest. So naturally she made me carve her pumpkin. Yes, they said anyone in the family could carve a pumpkin and grandma, that is what we call my mother-in-law, could enter as many as she wanted. In fact my boy Zeke who helped me, I mean, whom I helped a little, OK, a lot with his pumpkin, took second place with his Jack Skellington looking pumpkin.
So I decided to carve the winner and let grandma pay for the parts. So we bought the pumpkin etc. and I made my daughter film it so I could pass it on to all you peeps.

Pumpkin Carving Process.

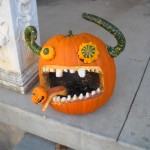
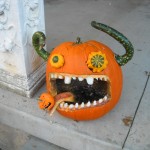
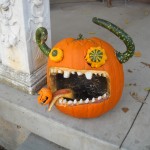
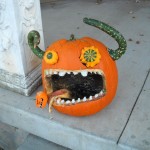
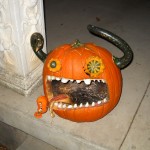
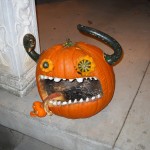
I start by designing it, drawing it, then drawing the face on the pumpkin, gutting it, carving it and then sculpting out the teeth, and the tongue. I attach the eyes, horns and tongue then carve a little pumpkin to put on the tongue and then paint and attach the little guy.

$50 GRAND PRIZE WINNING PUMPKIN!

(that does not say 50grand as in $50,000)
Grandma was so happy she spent the money on me and the kids. Ice-cream for the whole family. It is a lot of fun, you should do it, then you’ll have some cool pumpkin pics to put on Facebook or a video on youtube. And you may win a the prize at the company party.
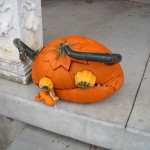
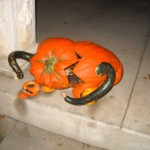
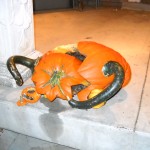
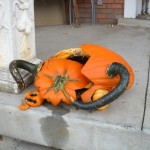
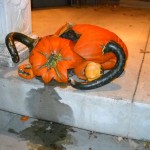
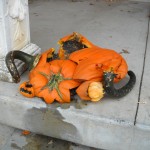
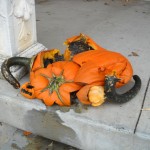
Halloween is almost here so I better go clean him off the front porch and make room for this years pumpkins and Jack-o’-lanterns. Besides, I don’t want any trick-or-treaters slipping in him and getting hurt.

Illustration Shortcut: Acrylic on Inkjet

“I cut my painting time in half by starting in Photoshop”

Will Terry of Folioacademy used a shortcut to create this illustration for a greeting card for PK Press. He Painted, or blocked in the base in Photoshop, printed it on watercolor paper, then finished it with his famous acrylic, dry-brush technique. He is always looking for ways to maximize his efforts. Deadlines are ever present for the professional illustrator, and when you can figure out a way to speed things up, you’re onto something.

What used to take forever can be done in less than half the time.

It took so much longer with the old dry brush technique, laying in the background and basic shapes, can be done in less than half the time using the right tools. Embrace technology, it’s not going away.

pic of finished piece: Blwfish

“I was able to cut my painting time in half by blocking in the foundation in Photoshop.” ~Will Terry

Photoshoped in some spray paint and printed on Watercolor paper.

He used to start his paintings on paper, transfer it to paper, and paint the whole thing with his paint and brushes.
Awhile ago he took a leap of faith and tried something new. This became the phase where he would start in Photoshop and finish with acrylics. “I scan my sketch and paint flat color on it in Photoshop, Then print it on watercolor paper, add texture gel and paint acrylics on top.” He now paints most everything digitally from start to finish but this was a crucial step in that direction, you may want to try it.

J. Kirk Richards

We got him! Another celebrated artist has come to Folio Academy: J. Kirk Richards!

Richards is acclaimed for his spirited portrayals of the human form, both in oil paintings, and stunning sculptures.

J. Kirk Richards lives in Provo Utah with his wife – who is an artist as well. They also live some of the year in pastoral Redmond Utah, where they spend their days in their country art studio. While Richards is fond of a variety of art styles, his work is prized most by those who are interested in spiritually-themed artwork. He has won awards in juried shows throughout the country, and his work is illustrated in many magazines, books, and film productions. His work is even present in two PBS documentaries. J. Kirk Richards fuses the old and the new with his works of art; symbolism and metaphor, and an emphasis on lyric composition bring the human figure to light.

The new video “Portrait Painting with J. Kirk Richards,” Is available for streaming on Folio Academy. In this hour and forty minute video, Richards will teach you all you need to know if your interested in painting portraits. From mixing oil colors and attaining accuracy, to filling rectangles with great design and composition, Richards will take you step by step through painting a beautiful portrait, even teaching glazing and finishing along the way!

The skill level for this film is best for ages twelve and up.