Scanning, Re-Sizing, Resolution, & Pixels in Photoshop

Getting the size and resolution right in Photoshop

This is mostly for beginners but a valid subject.

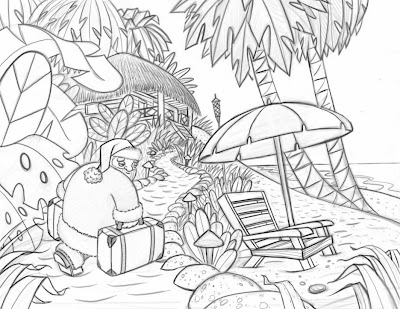
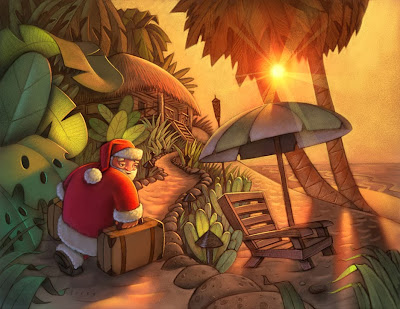
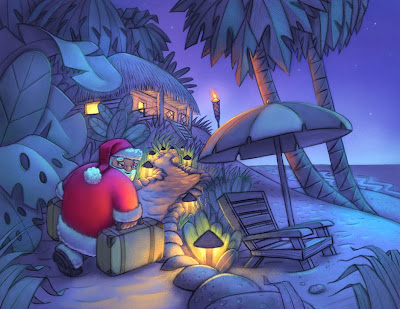
Scan your art or sketch and work in Photoshop to finish, paint or add color.

For those who sketch or start their artwork on paper but like to work in Photoshop

This is a question that we still get a LOT, so we want to address it.

Step by Step 

Scan your sketch or artwork into Photoshop at 150-300 pixels per inch.

Make sure Constrain Proportions is checked

Make sure Resample image is checked.

Set your pixels per inch to 300 pixels per inch.

Decide what size you want the printed piece to be and set your size. I.E. 8”x10”

There are a few things to be aware of when sizing a piece in Photoshop.

Get your Height, Width and Resolution right.

Get it into Photoshop and go to image then image size and just look at it.

Go down to Resolution in the Document Size area and see what you’ve got. If it says 150 pixels per inch, then that is how many pixels equals 1 inch in the resolution of your painting. Above the RESOLUTION there are the two Width and Height boxes, you want those in inches not pixels, so change that if you need.

Above that there are the Pixel Dimensions, this is the total number of pixels, not pixels per inch but per the entire piece. Set your width and Height to Pixels.

Make sure Scale to Style, Constrain Proportions and Re-sample Image are all checked. Like so.

Pixel Dimensions

Width      [big number]           Pixels

Height     [big number]           Pixels

Document Size

Width         [     8.5     ]            Inches

Height        [    11       ]            Inches

Resolution  [    300     ]          Pixels/Inch (Pixels per Inch)

[ x ] Scale Style

[ x ] Constrain Proportions

[ x ] Resample Image

Printers and publishers usually want everything to be at 300 pixels per inch.

They also want it to be so many inches, like 8×10″ for example.

You want your illustrations to look good. So…

Increasing the Resolution does not increase your resolution.


Set the parameters and get the scale right in Photoshop

Now that you are working on your sketch in Photoshop, you want to set the parameters and get the scale right.

Screen resolutions is about 72 dpi, (Dots Per Inch, or Pixels Per Inch)

There is nothing you can do to increase the actual information that you have. If you take a small picture scanned in at say 75 DPI and blow it up, it won’t give you ANY more detail. Like a projector, if you back it up and make the image on the wall bigger, the image will not be any more clear, just bigger. So Ideally, when you work, you want your finished piece to be big and clear, you can always make it smaller. Don’t go too big it takes longer for your computer to render.

If you have an 8×10 piece scanned in at 150 and you just change your Resolution to 300, it doesn’t actually change the resolution of your work and leave all the other parameters the same. It will decrease the size of your piece.

The reason I set my scanner at 150 instead of 300 is because I don’t need too much detail to go from a sketch to a finished piece, so I scan it in at 150 then change it to 300, then I work in 300 dpi so my finished piece will be acceptable for the printers, and it will have the detail and clarity that it needs for the size that it will be printed.

So you want your width to be the right size for the printer, say 8 by 10”.

You want your resolution to be 300.

Now you can zoom in on your work and zoom out without changing the end size or resolution.

Make sure Constrain Proportions is checked. 

[ x ] Constrain Proportions wants to be checked so that if you change the width, the height will change proportionally and vise versa. If you want the width wider but want the height to stay the same, if you just change the width, it will skew your art, so it would be better to keep your proportions, so you should just size it bigger and cut some off.


MAKE SURE resample image IS CHECKED.

[ x ] Resample Image is important so that if you change your work from 150 pixels per inch to 300, it will boost your actual pixels per inch as well. Otherwise, with Resample image unchecked, you could change your work from 150 to 300 Pixels per inch and  size of your work will drop to compensate for the change. Now when you go to ship that finished work to the printer, your 8 by 10” piece will be more like 4 by 5”, and that is not good. You Cannot just make it bigger with out making it all pixilated and blurry and crappy.

What a publisher wants

Most publishers want your work to be at least 100% of what they want to printed piece to be. 8-9” by 10-11” and at 300 pixels per inch.

 Have fun with it, explore. 

Fool around with some of these and see what happens to your image and the other perameters when you make changes with Constrain Proportions and Resample image checked and unchecked.

The danger is that you can be working along and not realize that your pixels per inch or your resolution or your document size is way too small until you are finished. And that is a painful lesson. Ouch!


for more info on this same thing, watch this video by Will Terry.

Painting Color and Light for illustrators and artists: contest part 2

Start with a good drawing.

There’s still time, to do the Coloring contest, see post

It seldom works to start with a bad design and then just fix it with color. Good light and color will look better with a well designed drawing.

It would be nice to give you all the answers but I think I’ll give you all the questions, that way you can come up with the answers.

Things to consider for your artwork

Light and Shadow What is value and how is it used?

What are gradients and how do they work in a drawing?

Can drawings work in mostly light values, dark values, both?

Lighting shapes, What direction should my light be coming from?

How does light fall on a sphere, cube, cylinder, & human form?

What is the relationship between the darkest dark and lightest light?

Why is reflected light important to show form?

What are cast shadows and what happens to their edges?

What direction do shadows go?

What are occlusion shadows?

Painting Color, What colors should I buy or use?

Are white and black colors?

Should you ever use black?

What happens when you mix various colors?

What are cold & warm colors?

What is a vibrating color?

What are color opposites?

What’s the difference between primary, secondary, and tertiary colors?

What are tints, shades, and gradients?

What is a triad?

How can you neutralize two colors?

What’s is a complimentary color scheme and an analogous color scheme?

How can I get rich color in my painting?

Where can I learn to draw and paint better?

How can I enter the little coloring art contest for artists and illustrators everywhere?

PHOTOSHOP PLUG IN DOES THE WORK FOR YOU

New Photoshop Tool Makes Painting TOO Easy to Believe

Christmas Card

I know we don’t usually post on a Tuesday but this is a special occasion that can’t wait. This new plugin is SO usefool, You would have to be a fool not to look at this new Photoshop tool. Some wonder if computers are going to make it too easy. We will have to compete with every fool out there that can afford a PC and Photoshop.

Watch this short Demo video while Mr. Folio Academy, Will Terry shows you how easily he just painted this beautiful digital creation of Santa Claus on a snow board.


You probably want to know where you can get this cool plug in and how much it’s going to cost. They say that the right tools don’t make you an artist but I am starting to think that this is all I need. I am so greatfool for this new plug in. The cool thing is, the company that created this affordable plug in is working on another one that is equally helpfool. It does most of the drawing for you. It will be released 04/01/2015 a year from today. Happy april fool’s day.

Comments welcome.

Making the transition to Digital Art

So you want to draw and paint digitally but don’t quite know how to make the transition.

Digital artwork after taking a few digital courses

After Taking a few courses
by Lisa Lavoie

Digital art is increasing in popularity but where do we learn how to do it.

 Most artists start our creating art on paper. We were all children drawing on walls and furniture and our good mothers and fathers put paper in front of us and encouraged us to create our masterpieces thereon. They later hung those treasures on the refrigerator for the world to see and admire. And that felt good.

As we develop our craft, we get more and more comfortable with the tools we use. Now days we see so much artwork being created digitally and if we want to joining in, we have a whole new learning curve. But the benefits of certain features make the switch well worth it in so many cases. Features like, Undo, Blur, Copy and Paste, Re-size, Distort, Transparency, Layers and much much more make it so desirable to work online.

There is no replacement for practice of stick-to-it-ive-ness. Getting out there and fooling around with the tools and layers, and features. Using the tutorials is also a good idea. Once you get comfortable with the whole digi process, you should explore new ideas and textures as well. And bounce ideas off your friends and other artists. Will Terry had help from some of his students at first.

Sometimes all you need is a little instruction from others who have developed a their technique in the digital world.

This is the kind of email we like to receive.  Creative Directrice Lisa Lavoie at lalatopia.com, is one of our happy fans who had this to say.

Hi Will!

Just wanted to say thanks for your Folio Academy courses – I’ve gone through several, but the painting and color ones were the most helpful.

Attached a pic of what my digital art looked like before + two pieces I just finished after watching your courses. Obviously my illustration technique had already progressed substantially  – but was getting nowhere trying to convert to a digital workflow that didn’t look awkward and digital. And now my digital art is even better than my real media pieces!

Thanks again :)

Lisa

Digital artwork before taking a few digital courses

BEFORE

Digital artwork after taking a few digital courses

AFTER

Thank you Lisa for your kind words. You have a really cool and unique style.

For those of you who are still reading, these are the digital art course we presently offer at FolioAcademy.

Five Quick Photoshop Tips for Illustrators by Dani jones. Justin Cooks three courses, Digital Inking and Coloring in Adobe Illustrator, Digital Inking And Coloring in Corel Painter, and Learn To Draw Cartoon Zombies. And a few by Will Terry like, Digital Painting in Photoshop 1 and part 2, Painting on the iPad, and Beginning Photoshop for Digital Painting.


How to Draw Zombies

Why do so many want to know How to Draw Zombies?

picture of finished peice

draw these zombies with Justin Cook

Zombies seem to be passing Vampires in popularity. I guess it’s about time to ad a “how to draw zombies” lesson, to our site. I wouldn’t be surprised if Stephanie Meyer were writing a love story between a walking corps and a beautiful young woman right now. I won’t read the book (my wife and daughters will) but I will definitely watch the movie, “Waking Dead”.

Our latest lesson is “Learn to Draw Cartoon Zombies” lesson by Justin Cook from the UK.

He shows you how to use Photoshop to sketch the zombies, ink them and then color them, or as he may say it, “colour them”.

how to draw zombies, inked.This course will teach you how to draw creepy, but cute zombies using Adobe Photoshop and a Wacom tablet or Cintiq monitor. He draws each of the five characters and shares his tips as a professional illustrator. The techniques he uses to “ink” can be appreciated even by professionals who might want to learn how to work digitally. Justin combines the pressure sensitive brush tools and the pen tool to paint a beautiful layer of “ink” with an emphasis on line variety. Then he teaches you how to use dedicated layers to add color and value. how to ink cartoon zombies

You don’t have to go to the UK to learn how to draw zombies from this master, thanks to FolioAcademy.com you can learn from an artist with a way cool accent. how to draw zombies, colored.

I just finished watching season three of “The Walking Dead” via NetFlix and I gotta say, Zombies are cool. I wouldn’t want to be one, raise one or fall in love with one. But as far as the world of the undead goes, zombies rock.  I’m just sayin. . .

NEW TUTORIAL! Learn how to use Photoshop

I just finished a new video tutorial so you can Learn how to use Photoshop – a basic video series on how to get started in Photoshop.

We have been receiving requests over the past year to offer a video that would help the person who has never used Photoshop get started.

This tutorial is a focused on helping the student learn how to use Photoshop for painting in my Digital Painting in Photoshop tutorials Parts 1 & 2.

Instead of being a general beginner course I leave out all the photo editing specific tools and methods. You will learn how to use photoshop basic tools, settings, windows, and the controls that I use to make a painting in Photoshop.  I do share my Wacom tablet settings and opinions as well.  If you’re familiar with Photoshop you won’t need this video but will probably be fine jumping into parts 1 & 2 of Digital Painting in Photoshop.If you know anyone who has wanted to move from traditional mediums like acrylic, watercolor, colored pencil, etc – this video might be just the thing to get them started.

how to use Photoshop for beginners

Check out a sample here.

If any of you have already purchased my Digital Painting in Photoshop parts 1 or 2 and would like this beginner course please just leave a comment below – make sure you leave your email address associated with your http://folioacademy.com/ account so I can look you up – and I’ll GIFT you this new tutorial for free! So you may want to purchase one or both of these Photoshop part 1 & Part 2 first, then get this FREE!One more thing – I do not paint in this new video but I do explain how to get around in photoshop in the most basic ways – and how to use many of the tools. Check it out at Folio Academy.

New How to Photoshop Tutorial


Whoooeee – I just finished my new How to Photoshop lesson!

This was a fun one and now I’m in the editing process for the video tutorial. As I mentioned before I’ll be giving this one away for FREE to anyone who has purchased my “Digital Painting in Photoshop” Videos from either my site or Folio Academy. It’s my way of saying thanks for all the support we’ve been getting and continue to get. I hope to be finished with the editing process in a week or so – I have a crazy hectic schedule at the moment.

Painting of a cat on a turtle done in Photoshop by Will Terry.
I’m tired – having fun but tired – I’m wearing lots of hats right now. Just trying to get the colors right – this piece is a challenge because there isn’t a lot of warm light which means almost everything needs to be on the cool side.


It’s slow going but I’ll get there. Just starting to add lighter values and colors and trying to figure out my color scheme as I go. One of the advantages of working digitally – testing colors on “throw-a-way” layers.


I’ve now added a “multiply” layer and started to work color into the background using the airbrush with the “texture” turned on in the brush pallet. The texture is a scanned texture I made with acrylic heavy gel medium and black and white acrylic paint.


I added the value on the ipad using the airbrush tool. I want to try to figure out where all the dark and light areas are going to be before I start adding color. This is crucial because once you get deep into the color process it’s hard to fix value problems.


Since I’ve switched over to Photoshop 5 I thought it might be nice to offer another tutorial. I’m going to give it away for FREE to those who have already purchased my “Digital Painting in Photoshop” video series – I’ll just update everyone’s account at Folio Academy with this new video series. So what I’m going to do is work on it a little each day and post my results here on my blog as I have a big project for National Geographic Kids Mag going on right now too.

This is a little sketch I did on my ipad with my finger – I’ve gone paperless by the way – I never intended to go green but when technology makes it easier to use than paper…

I’m calling this painting “Class System”. I find it ironic that often it’s the working class/poor who are much happier in life than the rich who control everything but still turn to drugs, alcohol, and suicide. Oh no – I actually have something to say? This is weird.

Anyway, I’ll try to post my results each day for a week or so.