HOW TO MAKE A STORY APP – STEP 8, The Final Step

For links to steps 1-7 found scroll to end of post. 

Step by Step, How to make your own story app, part 8. The final step, I hope. 

How to Build and Upload Your App to Apple

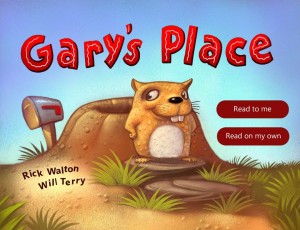
Garys place

Building and Uploading Your App to Apple is the part that scares me most. I am no techno genius, In fact I am a right-brained techno phobe, like all good hearted artists. So I am hiring my son Aaron, who also happens to be no techno genius. But unlike me, he is willing to learn.

WE CHOSE TO USE KWIK BY KWIKSHER.

You can use any app building program you want for this process. We My son Aaron and I, Okay, my son Aaron, not we but he, used KWIK. One reason for that is because it is a WYSIWYG program, (what you see is what you get) so you don’t need to be a programming genius to use it. That is KWIK created by Kwiksher see kwiksher dot com for more details. Alex Sossa is the president and founder.

I had my son Aaron do the “programming” for me. Okay, I paid him to do it for me. Hey! I’m an artist. I will let him tell it in his words. Now that he has gone through the learning curve he will be doing my next app soon and he will also do this for hire as well as coaching for hire. (in-case you don’t have children of your own to do it for you)

So Aaron, what do you say?

I say that Kwik works as a photo shop plug in, you can use layers to move things around, and you use the tools within the plugin to build the app. You can show and hide images. It is pretty neat.

“Aaron is an average kid, mediocre grades in school, not a Genius by any means, no offense Aaron.” ~Will Terry

Non taken, Dad.

He is not a programmer, he didn’t and doesn’t know coding. He is not into math, he is a lot like me, he didn’t do TOO WELL in school, was never interested in math etc. He was able to learn Kwik he says, “it is a powerful tool, like photoshop”, he was tired of working at HomeDepo and I was willing to pay him. (his motivation) ~Will Terry

Thanks dad, I’m dumb as a post, I think they get it.

It was a pretty hairy process at first, I was using a mac for the first time, photoshop for the first time and Kwik was new to me too. But I got some immediate gratification when I got started and I could see that I was making progress. On the first day I was able to get something to animate. That was cool and motivating.

You are not going to be able to just take Kwik out of the box and roll with it, but within a week or two you can get pretty good at it. There are a lot of forums and help, most questions are addressed. There are a lot of newbe questions, especially for artists on there.

I started before my dad was actually done with the art part of the app and some of his work wasn’t done when he sent it to me, I even had to send it back to him and tell him to finish it or clean up some over spray on a few layers. I think we work well as a team. That was a little weird, telling my dad to finish his job rather than him telling me to finish something like mowing the lawn or cleaning my room.

Getting your app ready for the build.

You should have all your stuff together and well organized. Maybe even story board or sequence or flow chart.

You need to make sure that any object you want to move better be on a different layer. You can compress them later or whoever puts it to the app can compress it later. (like if you have your daughter or son do it for you)

My dad decided to only have one animation per page so’s not to confuse the child, or end user.

Timetable to learn and use Kwik

If He had everything finished, it would have taken about a month for me to do it. Now that I am familiar with Kwik I could do it in half that time. There is definitely a learning curve. You won’t be able to just open Kwik for the first time and build away. But it is a good program and it is learn-able. I would give it a week before giving up. By then you should be empowered and start liking it.

Kwik does the PROGRAMMING for you,

It would take me about 10 minutes to make a page and for example I looked at one page that took about ten minutes to put together and the program generated about 238 lines of code, and I didn’t have to write or code any of that. Go WISIWYG!

Your work-space is inside PS (That is code for PhotoShop) and you test a page by exporting it to Corona. Just get in there and open it up and look around. It is pretty self-explanatory.

We also used a highlighted text feature. That was kinda hard and I wouldn’t have been able to figure that out without the tutorials, but once you get it, it is pretty easy to implement.

In my honest opinion, I would say you need to give it a chance. Then it is fun, watch some beginner tutorials, you can find them on the Kwik website. There are classes too. My dad helped Alex make some of those videos so he recommends them as well.

Would I use Kwik if I had it to do again?

In Kwik you combine all the voice files, the text files, animation files etc. I used Kwik and I will use it for the next app which we will be starting soon. So that should be a good testimonial for Kwik. Kwik doesn’t take any of your profit percentage like a lot of the other programs out there. Other programs aren’t as robust either, but you do have to buy Kwik, it is an annual subscription, I don’t know how much that is but you can surely find out on their website. One more reason to hire out. Hey! You’re an artist/app creator, have a trained professional like Will Terry’s son do the grunt work for you.

needs, if you are using Kwik to Create your app.

You need Photoshop SC6 or CC installed on your machine, it can be a PC or a Mac to make your app, you have to have Kwik, and then you have to have Corona SDK, the software developer kit, installed which It will give you an iPad and an Android and all major devices simulator.

Email Alex, the President and founder of Kwiksher.com

Rather than emailing me or asking any technical questions here on this blog, to which we Will or Wayne wouldn’t know how to respond anyway, you can email Alex if you have any questions about Kwik. His email is alex@kwiksher dot com Contact him especially if you have technical questions you can’t get answered anywhere else. He is great about responding and helping.

Another plug for Audacity, 

I also want to mention Audacity again, it is a free sound editing program. We used it to manipulate sound files. We used our voices and then altered them. It is a great program too.

Publishing to the apple app store. The fun part. Sarcasm intended.

Not fun at all. Apple is big, they don’t care if it is tough, there is little or NO help. They are big, they know they are big and they don’t care about you or me. I ran into a roadblock, at one point they just returned my money and said that they can’t accept a technical report request. I had to go back and redo a bunch of steps and look online for help. There are a lot of online forms to fill out. They need a lot of info.

You have to make an Apple developer request for which you pay them $99 per year and… You generate a signing request, you generate a certificate using that signing request, you download and install the certificate, then you generate a provision profile using the certificate and you will include that certificate in your app and Corona will search your system for that certificate so when you click build you will include that code in your app without having it put it in there manually, which is pretty nice.

It is not intuitive at all. It took me a week and a half to get it in there. Very frustrating!

That is pretty much what we did. Good luck. Back to you Dad.

In Closing…

Thanks Aaron. OK so, I will be sharing my sales and success or lack thereof in upcoming blogs, so stay in touch and wish me luck.

A way to build momentum in a really noisy market place like we are in, is to build your brand. I don’t see you getting rich quick with apps as there are so many out there. But the playing field is level and you can still play. Get up and do it and keep doing it and enjoy being a producer. There are a lot of consumers out there. We are all consumers, so we need producers like you to produce good products.

Why not hire a coach or an app builder?

My business partner Wayne Andreason has come to say, “If you want a job done right, don’t do it yourself.” Unless of course, that is what you do.

Aaron TerryMy son Aaron Terry no longer works at Home Depot, so he will be assisting others with their apps.  He is building a website now and will be offering Coaching for a fair price, and if you get frustrated or don’t want to bother with it, like me, he will be offering his services as an app builder as well. Right now he is reachable at aaron-terry@live dot com (that is code for his e-mail. use a . for dot and no spaces.)

So if you want to learn art now, go to FolioAcademy.com, if you want your windows washed, go to http://alpinewindowwashing.com/ if you want your teeth fixed go to http://www.spanishforkutahdentist.com/ But if you want your app built, go to Aaron Terry my son and office partner.

If you want to jump to the next step, Step 9, check back around (Feb 14,14). I knew I would never finish. So when I said step 8 was the final step, well it WAS, but it ain’t anymore.

and if you want to read see the previous steps, 1-7, here they are, click on the following links. Step one, two, three, four, five, 5.5, six, and seven.

HOW TO MAKE A STORY APP – STEP 7

links to previous steps are at the end of this post. 

Add sound effects to your story app.

Adding the sound effects was one of the funnest parts of the creation process. I was amazed at how the sound can “sell” the animation or idea – it’s pure magic. Watching your little animations is great but they are silent by themselves – adding the right sound brings them to life.

A few tips for finding and applying sound effects to your apps.

I used freesound.org for a bunch of the sounds in my app. The sounds are free to use as long as you give credit to the artists in your project. I only used “public domain” sounds and “creative commons” licensed sounds. The agreements can be easily viewed and read on their site.

I also created some sounds using tinyvox on my iPad and then altered them in Audacity. I couldn’t find a good digging sound for Gary but I knew what I wanted – so I scratched my pant leg  – I know – weird right? But it made a pretty good sound and I could kill tow birds with one stone. (don’t really kill birds) I could get that sound I wanted and scratch that itch on my leg at the same time. Then I doubled it up in Audacity, changed the pitch, and cleaned up the front and back end and it was perfect!

Kwik allows you to use both mp3 and wave files which you can create in Audacity. My total learning time in Audacity was about one hour from fooling around with the program and watching youtube videos produced by 8 year olds.

One of the most important things you can do with your sound files is to chop off the dead space at the front and end of the clips. You don’t want the users of your app to hear hiss or crackle before the actual sound is about to play.

Stay tuned for more Steps. Coming soon.

Cover Picture of Gary's Place


I’ll keep sharing my progress on “Gary’s Place” which I plan to submit to Apple, In fact, It is NOW only available on IOS But – we’ll have it up on Amazon for android very soon!…did I mention – IT’S DONE!!!!, Google, Amazon, etc. in a few weeks. Just in time for Christmas (Next Year) I’ll continue to blog about this process even sharing my sales stats when it hits the various app stores!

A few reviews already:

“My Kids adore Gary.” ~Sabrina Chamberlain-Parks

“Great job Will! I loved the page/scene transition especially.” ~Jan Clifton Watford

I bought the app for myself, I don’t even have kids and I loved it. Gary pulls you in and you can’t wait to turn the page to see what he’s up to next. Great job Will, I’ll pass it on to my parenting friends! ~Zulu Zulu

See how to make a story app from the beginning.

If you’re wondering where the first steps are I started this project back in September 2013 – check these links: And if you just want to brush up on your nun-chuck skills, or rather, your art skills, take a course at folioacademy.com, art lessons online.

Now available, Step 8. The final step, till we add more, are you ever realy finished?

Step 1Step 2Step 3Step 4Step 5Step 5.5Step 6

Art Lesson Videos 50% OFF through December

Online Art Lessons for FREE! Well, it’s like buy one get one free.

It’s actually more like, buy one for half price, or buy several for half price, but hey, I’m an artist not a mathemutation, or mathematician or what ever.

Code: xmas

Hard to find: Promo Page: AKA

Christmas Mouse

Skip the boring stuff and click LINK… But first, memorize this secret code: xmas (all lower case letters, not Xmas or XMAS and definitely not X-MAS) Then type the secret code in the secret code box and click on the “Activate Promo Prices” box. BINGO! Now every thing is offered to you, our favorite customer, at half price. You can do this clear till Dec. 31.

Will we do this again Next year?

NO! NO! NO! Well, maybe… but probably not, we are thinking of doing a great big cyber Monday sale. But who knows, after all, we still love all our favorite customers.

Last year we let our favorite customers purchase as many of our art lesson video courses as they wanted for half price during the entire month of December. It was a lot of fun and a lot of our fans totally splurged and really enjoyed it. They said things like,

I have been learning a lot form your video courses.  I have been watching them every day for about three months.  I just wanted to drop my deep appreciation to you for being such a brilliant artist and teacher.

I have made a drastic career change from being a scientist to writing/illustrating children’s books.  I had no formal training on art and was struggling to break though.  Your video courses really helped me.  When I watch your video I am always inspired, electrified, and motivated.  With all that, I just wanted to say thank you very much for creating such brilliant arts and being a great teacher.

Sincerely, Aiko

Others have said things like, “Thanks”, and “Thank you”. 

Who are our favorite customers?

Like a grandmother that doesn’t want to play favorites, let’s just say, YOU are ALL our favorites. However, those who like us on FaceBook and register on this blog site, and say good things about us, and recommend FolioAcademy to their friends everywhere and love us, and follow us and stalk us, (in a good way, not the way where we end up dead or see incriminating photos of ourselves on the internet and stuff like that) and purchase our courses and they think Will is the best and they like Wayne, Will’s little buddy, for who he is and they want to be artists when they grow up and they doodle in class and church and they post their kids art work on their fridge, and they’re nice people, and they help others and they love others and they smile, and they compliment others and stuff like that. Well, those are our most favorite!

So any way, we are offering all our courses for half price to all our favorite peeps. That’s you and any other who can find the hard to find promo page and remember to put the secret code, xmas in the right place and then click on the “Activate Promo Prices” box.

Thank you, you favorite you.

Happy Christmas, and Merry New Year.


Personal ART Projects for Personal Progress

All Artists Should be Working on Their Own Personal ART Projects

a personal art piece by artist, Will Terry.


You’ve got to be working on personal projects.

By this I mean, something that you want to do for you, a non commissioned piece. You don’t have to have someone tell you what to do in order to create a nice piece for your portfolio.

When I was in School I would do some things just for me, or for fun or just for my portfolio. Other students would often ask me what assignment “that was for” and I would tell them that it wasn’t for an assignment. They couldn’t believe I would work if I didn’t have to. But I was working for me.

Some of my best pieces, were little things that I did as personal projects. These personal art pieces were also a big help in me finding me, or finding my style, or niche.


Keep it Simple, Stupid

By this I mean no disrespect, I am going with the KISS ACRONYM.

The most important thing about these personal pieces, I would say is to make them small, and therefor doable. That is to say, FINISH them. If you think you are going to create this gigantic masterpiece for you portfolio, you might be right, but more often than not, you are less likely to finish a BIG MASTERPIECE than a sweet little doable personal art project, especially at first. So remember KISS, not the rock band, the acronym. Keep It Simple, Stupid.


Start with Small Art Projects

I suggest you start with something small. Make one finished piece that will go into you portfolio, or not if it doesn’t turn out. Maybe your goal could be, not to stop until you get that little thing finished. Here comes another sports analogy. If you were going to run a marathon you wouldn’t just start a marathon. You need to work up to it.

One of the dangers is to want to bite off more than you will chew. Notice I didn’t say more that you can chew, but more than you will chew. I know that you can do what ever you put your mind to, so I’m saying, that you are more likely to put your mind to something that is simple, and therefor finish it, especially at first.


Tell that Negative voice to shut up!

The danger of choosing a personal art piece that is too grandiose is that you are less likely to finish it, and if you fail to actually do it, you are training yourself that A, YOU don’t always finish what you start, and B, it is OK to fail. Like if you decide to do a complete comic book or picture book and put it out there on Kickstarter, you may fail or run out of time or just get sick of it. Then you have that stupid little voice in your head that is there for all of us, you know, that voice that says “you won’t finish this” then if you DON’T finish, it will say, “see? I told you soo”. So beet the negative little voice,  choose small, doable, personal little projects, and complete them. Tell that little voice to SHUT UP!


Graduate to bigger projects, if you want.

I am finally getting to the point where I am finishing a story app. It is a big endeavor, but I have done dozens of smaller personal projects in the past and several big projects too. Even though I have done a lot before, this one is still a little tough, I gotta be honest. I still have that negative voice, and I have to keep telling myself that It will get done. I have to remember to enjoy the journey and the process along the way.


Choose something the YOU want to do.


Choose a personal piece that you want to do. If you are creating something that you want to do, it will be more fun and more likely to turn out. I have a friend who loves animals, so she paints animals. If you have a hard time with people, stay away from people or work on parts that you can conquer, like a back or torso, then build up to the harder stuff, work on something that you can do. Cats maybe, or a plate with fish on it. Who knows what you will like. Take something boring and make it exciting. They don’t all have to be gems.


 Take Some Risk

I’m not saying to invest a lot of money here, But I do want you do invest a little time and energy, and challenge yourself. Not too much at first, we need to have some successes to build confidence and self esteem.

Remember in an earlier blog I mentioned that a child likes to draw and paint and create artwork because it is fun and fulfilling. Not because she thinks it will make her a lot of money. Don’t kid yourself that you are going to sell all of your personal pieces and make bank. That isn’t the motivation here. Ironically, that is the work that will get you closer to making money as an artist, Or making more money as an artist. And who knows, you may monetize your personal pieces. The more you have, the more likely you will be to sell a few. Who knows. Some artists create a little personal piece of artwork every day and then sell them on their website. And that’s all they do. Win Win Win. Artist improves and hones his skill, artist makes money and end buyer gets a valuable piece of artwork.

Most of the projects I have done, I would say, well that negative little voice in my head that just won’t mind his own business and shut his big yap, would say, they mostly all failed. But did they? Well I didn’t capitalize on all of them, but they all helped me develop my style, my portfolio, my talent and my art stamina. So NO, they did not fail. They all succeeded in one way or another, even if just to keep me in the zone and to help hone my skill.

Just Do It!

Get on it and do a personal piece and then do another. To steel a quote from NIKE, “Just Do It”  and before that, Spencer W. Kimball, who used to say “Do it!” You just gotta do it.

My seventh grade, wood shop teacher, Mr. Swayze would always say, “Git-R-Done!”

“Git-R-Started might have been a better tag line because that seems to be the hard part every day when you looking at that blank canvas or work in progress. So Git-R-Started and Git-R-Done!”

Don’t Worry About Perfection

It’s a personal project so you don’t have to worry if it isn’t perfect or if doesn’t turn out. Everyone has at least 1000 bad paintings in them so feel free to get a few of them out of your system. You don’t have to hand it in to an art director, so you need not stress. Learn from it, try new things, this is where you can totally be you. If it sucks, don’t show it to anyone. Don’t throw it away either, at least not yet. You may want to use it as an example someday when you are teaching.


The Pose-able Wooden Artist Doll Has Come a Long Way, Baby.

The Pose-able Wooden Artist Doll Has Come a Long Way, Baby.

Meet the new!

poseable 2

Meet the old. 

Every artist has contorted their hand and looked in the mirror trying to figure out how to draw different poses. The wooden doll was a great invention for capturing gestures of the basic human figure.

Now for around $300 plus shipping you can get the S.F.B.T-3. WOW! This doll has few limitations.

Manufactured in Japan by Dolk Station, the S.F.B.T-3 is made from ABS resin, which is stronger than the colour range used in the first version. Priced at US$300, orders can be shipped internationally.

Ten years in the making, this girl has 80 moveable parts in her body, allowing for an unprecedented number of poses and anatomical designs. We take a look at the doll’s amazing details and see how it performs in some popular anime poses for the illustrator’s eye.

▼ The lines and shadows in the hands give you incredible detail when it comes to gun-holding scenes. All that’s left to do is load her up with the weaponry of choice.

poseable

▼ The flexible torso allows for increased movement and more precision when it comes to the natural angle of a back arch.

20130923_221824_resized

▼ The eyes can even be manipulated to face left, right, up or down.

coming20110904_45

coming20110904_46

▼ The forearm twists with the hand to provide an accurate silhouette.

coming20110904_47

coming20110904_48

▼ The toes can be adjusted for accurate running and leaping movements.

coming20110904_55

tumblr_lqssi2aDZS1qzcmt6o1_500

▼ Although able to support herself in a number of poses, a stand is included in delivery.

image6

image9

▼ The attention to detail is enhanced thanks to over 200 parts used in her construction.

image4

20130312115914cont

For more design details check out the video below or visit CrabFu Blog for a full review.