PROCREATING! ER UM…CREATING IN PROCREATE

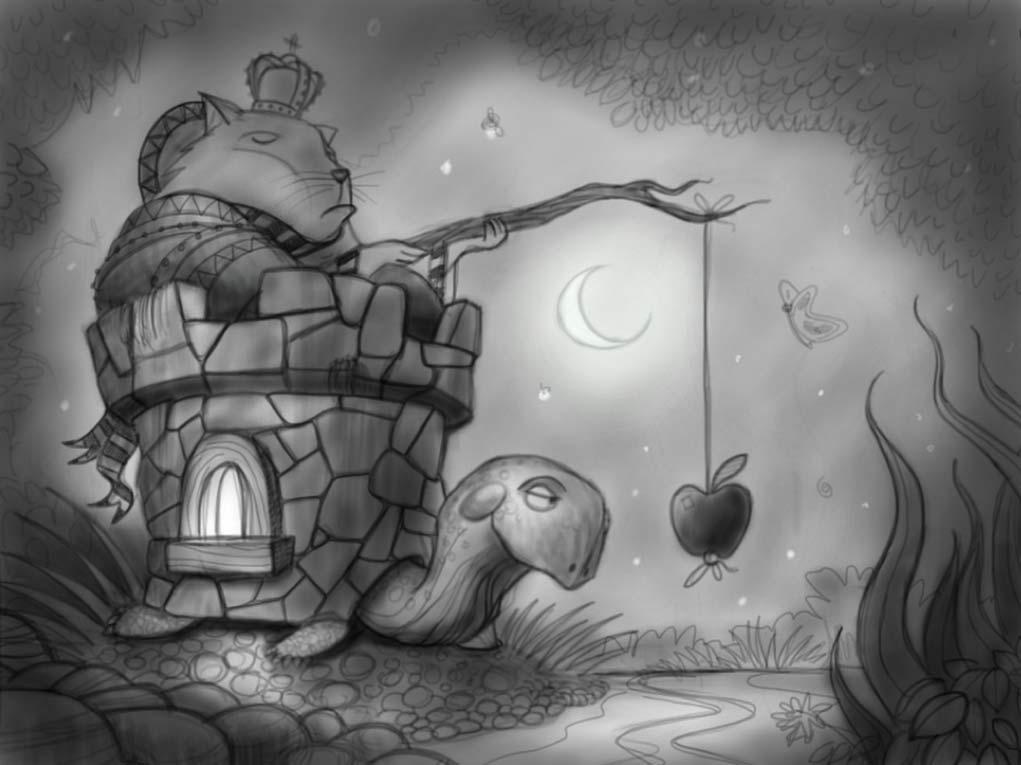
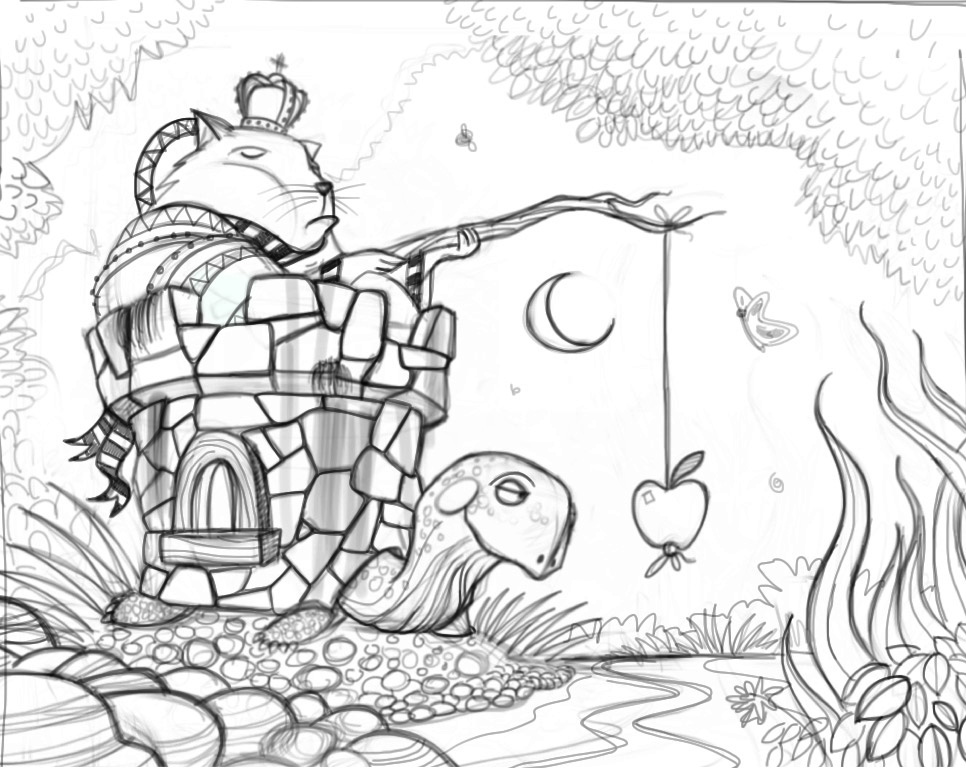
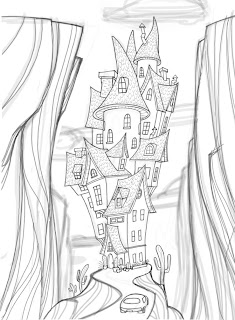
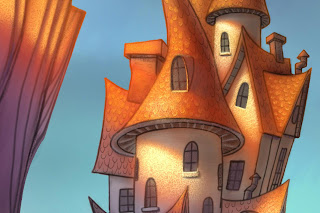
I created this image using Procreate on my iPad – I love this app!

Link to FolioAcademy.com Digital art tutorials

I just got back from the SCBWI Southern Breeze conference in Atlanta. I was being entertained by Dianne Hess (editor at Scholastic) as she gave her speech – an inside look at her company. I have to draw to listen so I was on  my iPad using “Procreate“. It’s my go to program for creating all of my sketches now – I love the screen rotation feature and the larger file sizes. Oh yeah – and I’m still only using my finger. I find it fascinating that it bothers people that I won’t go out and drop coin on a stylus. It bugs my students, friends, and strangers that I meet – like the guy who sat next to me on the plane. “You know you can buy all kinds of styluses for that device,” he informed me…I just agreed….by the way it strengthens my resolve to run sans stylus with each criticism.

A special shout out to Elizabeth Dulemba for inviting me to speak, being a great host, running an awesome conference, and being a great illustrator. I met so many cool people down there – too many to list but you know who you are! I hope to be able to get down there again sometime.

Painting with Cool and Warm Colors

Warm Light, Cool Shadows add to a beautiful Contrast

a Will Terry Digital Painting of House type Castle

I painted this as a demo for my digital painting class this semester at UVU. I really wanted to play around with a dramatic lighting situation.

Photograph of Red Rock cliffs with Harsh Light and Shadow.

Get inspiration from the real world.

One of the reasons I’m a big advocate of getting out there and seeing the world with your own eyes is the feeling you get and the inspiration to find a place for it in your work. I woke up to this last year in Utah’s Goblin Valley last year Needless to say, I was inspired.  – my tent was about 5 feet to the right.

Rough Sketch of House/Castle on iPad

So this is how I begin my sketches on my iPad.

I call this the ugly stage. I’m basically making a “map” for me to trace and perfect on another layer. At this point I don’t care about detail – just the raw elements and proportions. It’s sketchy and loose but it will serve as my guide.

Pic of ProCreate Logo

Use “Procreate” for a larger file size, plus you can rotate your “paper”

I’m using “Procreate” now because I can have a much larger file size then “Brushes”  – AND – I can rotate the “paper”. That’s a huge improvement. Down side: (why is there always a downside?) It’s much slower than brushes. I’ll be making an update video for my “Painting on the iPad” video tutorial that demonstrates how you can use Procreate for your workflow.

drawing of House/Castle

And this is the perfected sketch. I probably used about three more layers to get to this point reducing the brush size and increasing the value of my lines.

House/castle digital painting in process

I think it’s really neat to look at this part of the painting because it looks so dark and different than the part in the sunlight…similar to the photo I took. I added the color in Photoshop CS5.

digital paining of House/Castle in process

I love light and shadow.

You really can’t have one without the other can you? I really like exploring with cool colors vs warm colors to see what interesting blends happen and the mood it creates.


Create Your Own iPad App

Develop a Children’s Book iPad App 

Using the iPad app, Demibooks Composer, you can develop a children’s book iPad app without writing code. See how at FolioAcademy where you can find all sorts of online art tutorials.

Develop a Children's Book iPad App


Step by Step Process

Heidi Berthiaume, iPad app Developer at FolioAcademy demonstrates her step by step process on developing your own iPad app. It isn’t as hard as you might think. Impress your mom, your friends, your enemies with your own iPad app ready for them to purchase   online.

Create a children's book iPad app


Use Composer to make an interactive storybook.

Let Heidi show you how to use Composer to make an interactive storybook with page navigation, animations, physics, sound effects, a voice over, and a Hide & Seek game. All of the interactivity is created from menu options and since you are working on your iPad, when you Preview your pages, you see everything exactly as your reader will. Having developed her Bud the Bunny iPad app and another children’s book iPad app for Kane Miller, Heidi Berthiaume shares her experience with Composer using pages from her Bud the Bunny app as specific examples of the kinds of interactivity it is possible to create without learning a programming language. An iPad is necessary to run the Demibooks Composer app.

Find more on this at Will Terry’s blog

an Oily Start with a Photo(shop) Finish Digital

Started an oil painting and finished with photoshop


Start you piece traditionally to get a painterly look.

One of the problems with digital painting for a lot of artists is that it’s often hard to get the subtleties and happy accidents that traditional mediums provide.

One of the problems with painting in traditional mediums – like oils for instance is the lack of control or the tedious nature of finishing details – not to mention the fact that you can’t undo, adjust color, or zoom in.

This technique is probably not for Gallery art but. . .

Of course the solution won’t work for gallery painters or people who enjoy having originals but I had fun painting on this little oil painting in Photoshop. Originally I painted it on a Gessoed board in a few hours in my University painting class but never got around to finishing it. So yesterday I thought – why not scan it and spend an hour in Photoshop?

This is the original oil painting that I never had time to finish

Unfinished oil by Will Terry

Note see the flat strokes I made in the oil painting and the gesso texture.

close up, unfinished oil of jumping Fox

 I used one stock photoshop brush – the flat blunt (bristle tilt).

close up, jumping fox, finished in Photoshop

and here is the same oil painting with the digital strokes added in.

close up, of the grass in jumping fox painting.
My process is far from perfect. I don’t do this sort of thing every day but it can give you an idea of what is possible if you wanted to start your paintings in oil and finish them digitally.

Illustration Shortcut: Acrylic on Inkjet

“I cut my painting time in half by starting in Photoshop”

Will Terry of Folioacademy used a shortcut to create this illustration for a greeting card for PK Press. He Painted, or blocked in the base in Photoshop, printed it on watercolor paper, then finished it with his famous acrylic, dry-brush technique. He is always looking for ways to maximize his efforts. Deadlines are ever present for the professional illustrator, and when you can figure out a way to speed things up, you’re onto something.

What used to take forever can be done in less than half the time.

It took so much longer with the old dry brush technique, laying in the background and basic shapes, can be done in less than half the time using the right tools. Embrace technology, it’s not going away.

pic of finished piece: Blwfish

“I was able to cut my painting time in half by blocking in the foundation in Photoshop.” ~Will Terry

Photoshoped in some spray paint and printed on Watercolor paper.

He used to start his paintings on paper, transfer it to paper, and paint the whole thing with his paint and brushes.
Awhile ago he took a leap of faith and tried something new. This became the phase where he would start in Photoshop and finish with acrylics. “I scan my sketch and paint flat color on it in Photoshop, Then print it on watercolor paper, add texture gel and paint acrylics on top.” He now paints most everything digitally from start to finish but this was a crucial step in that direction, you may want to try it.

The Teacher In Me

App makers

The teacher in me is excited to teach the student in you.

The teacher in me wants you to find out what you can do.

The teacher in me knows what it’s like to have dreams come true and wants yours to come true too.


The teacher in me is afraid you won’t do what you need to do – but the teacher in me is still rooting for you.

The teacher in me lives through your triumphs.

The teacher in me knows you will fail again and again but prays you won’t quit.


The teacher in me can’t wait to see the teacher in you.

The teacher in me wants to be taught by the teacher in you.


Classes begin for me again today at UVU and I love it!

When I’m not teaching at FolioAcademy you can find me at UVU. I get so much out of teaching. Last semester in my children’s book class I gave my students the option to work on story apps. A hand full went in that direction and it was really fun to see what they came up with. We didn’t have time to work on their stories since it is an illustration class so they lack some of the polish that taking a children’s writing class would provide – but they learned by doing and are that much further along.


Here are a few of the apps they created last semester…

but one is missing :( Alicia VanNoy Call had her (TOTALLY AMAZING) app rejected by Apple twice because it didn’t have enough animation/interactivity. They wanted her to publish it as an iBook but she doesn’t want to do that for various reasons – so it’s in limbo at the moment.

I will really miss this group of kids – we really had a lot of fun!

Kitty Wants by Ginny Tilby (pink sweater)


Ricky the Fortune Cookie by Jared Salmond (second goof from the right)


Jumping Jackie by Kari & Von Brimhall

Jumping Jackie is from my long time college friends Kari & Von Brimhall – They did an amazing job animating their app using Talespring.com …if you want to see what’s possible at Talespring you should check out their app! I love their enthusiasim for creating ebooks and story apps. Kari is a homeschooler who’s kids are flying the coop and doing very well at college and now she and Von are living out their dreams creating for the pure love of it. They are one step ahead of me in that they already created a website to showcase their titles called instant sunshine.

How to Draw Zombies

Why do so many want to know How to Draw Zombies?

picture of finished peice

draw these zombies with Justin Cook

Zombies seem to be passing Vampires in popularity. I guess it’s about time to ad a “how to draw zombies” lesson, to our site. I wouldn’t be surprised if Stephanie Meyer were writing a love story between a walking corps and a beautiful young woman right now. I won’t read the book (my wife and daughters will) but I will definitely watch the movie, “Waking Dead”.

Our latest lesson is “Learn to Draw Cartoon Zombies” lesson by Justin Cook from the UK.

He shows you how to use Photoshop to sketch the zombies, ink them and then color them, or as he may say it, “colour them”.

how to draw zombies, inked.This course will teach you how to draw creepy, but cute zombies using Adobe Photoshop and a Wacom tablet or Cintiq monitor. He draws each of the five characters and shares his tips as a professional illustrator. The techniques he uses to “ink” can be appreciated even by professionals who might want to learn how to work digitally. Justin combines the pressure sensitive brush tools and the pen tool to paint a beautiful layer of “ink” with an emphasis on line variety. Then he teaches you how to use dedicated layers to add color and value. how to ink cartoon zombies

You don’t have to go to the UK to learn how to draw zombies from this master, thanks to FolioAcademy.com you can learn from an artist with a way cool accent. how to draw zombies, colored.

I just finished watching season three of “The Walking Dead” via NetFlix and I gotta say, Zombies are cool. I wouldn’t want to be one, raise one or fall in love with one. But as far as the world of the undead goes, zombies rock.  I’m just sayin. . .

NEW TUTORIAL! Learn how to use Photoshop

I just finished a new video tutorial so you can Learn how to use Photoshop – a basic video series on how to get started in Photoshop.

We have been receiving requests over the past year to offer a video that would help the person who has never used Photoshop get started.

This tutorial is a focused on helping the student learn how to use Photoshop for painting in my Digital Painting in Photoshop tutorials Parts 1 & 2.

Instead of being a general beginner course I leave out all the photo editing specific tools and methods. You will learn how to use photoshop basic tools, settings, windows, and the controls that I use to make a painting in Photoshop.  I do share my Wacom tablet settings and opinions as well.  If you’re familiar with Photoshop you won’t need this video but will probably be fine jumping into parts 1 & 2 of Digital Painting in Photoshop.If you know anyone who has wanted to move from traditional mediums like acrylic, watercolor, colored pencil, etc – this video might be just the thing to get them started.

how to use Photoshop for beginners

Check out a sample here.

If any of you have already purchased my Digital Painting in Photoshop parts 1 or 2 and would like this beginner course please just leave a comment below – make sure you leave your email address associated with your http://folioacademy.com/ account so I can look you up – and I’ll GIFT you this new tutorial for free! So you may want to purchase one or both of these Photoshop part 1 & Part 2 first, then get this FREE!One more thing – I do not paint in this new video but I do explain how to get around in photoshop in the most basic ways – and how to use many of the tools. Check it out at Folio Academy.

New How to Photoshop Tutorial


Whoooeee – I just finished my new How to Photoshop lesson!

This was a fun one and now I’m in the editing process for the video tutorial. As I mentioned before I’ll be giving this one away for FREE to anyone who has purchased my “Digital Painting in Photoshop” Videos from either my site or Folio Academy. It’s my way of saying thanks for all the support we’ve been getting and continue to get. I hope to be finished with the editing process in a week or so – I have a crazy hectic schedule at the moment.

Painting of a cat on a turtle done in Photoshop by Will Terry.
I’m tired – having fun but tired – I’m wearing lots of hats right now. Just trying to get the colors right – this piece is a challenge because there isn’t a lot of warm light which means almost everything needs to be on the cool side.


It’s slow going but I’ll get there. Just starting to add lighter values and colors and trying to figure out my color scheme as I go. One of the advantages of working digitally – testing colors on “throw-a-way” layers.


I’ve now added a “multiply” layer and started to work color into the background using the airbrush with the “texture” turned on in the brush pallet. The texture is a scanned texture I made with acrylic heavy gel medium and black and white acrylic paint.


I added the value on the ipad using the airbrush tool. I want to try to figure out where all the dark and light areas are going to be before I start adding color. This is crucial because once you get deep into the color process it’s hard to fix value problems.


Since I’ve switched over to Photoshop 5 I thought it might be nice to offer another tutorial. I’m going to give it away for FREE to those who have already purchased my “Digital Painting in Photoshop” video series – I’ll just update everyone’s account at Folio Academy with this new video series. So what I’m going to do is work on it a little each day and post my results here on my blog as I have a big project for National Geographic Kids Mag going on right now too.

This is a little sketch I did on my ipad with my finger – I’ve gone paperless by the way – I never intended to go green but when technology makes it easier to use than paper…

I’m calling this painting “Class System”. I find it ironic that often it’s the working class/poor who are much happier in life than the rich who control everything but still turn to drugs, alcohol, and suicide. Oh no – I actually have something to say? This is weird.

Anyway, I’ll try to post my results each day for a week or so.