iPad painting, with my Finger

iPad Painting; Finger Painting on the iPad

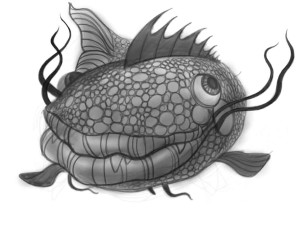
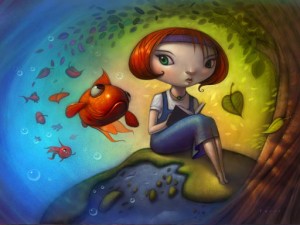
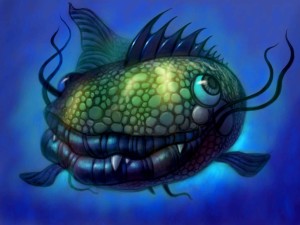
finished pic of a strange fish ipad painting by Will Terry

Complete with color.

iPad Painting is too fun. I’m having way too much fun with the “brushes” app fro painting on the ipad. I painted this at a doctors office and in the car waiting for my son and a little while watching old episodes of “The Office” on NetFlix with the fam. My favorite Michael Scott line: “Would I rather be feared or loved?…I want people to be afraid of how much they love me.”


iPad Painting & the lack of Pressure Sensitivity

ipad painting/sketch of the strange fish by Will Terry finger painting

Black and white finger painted on the iPad

But back to ipad painting – while the touch screen leaves many to complain about the lack of pressure sensitivity I find that an easy work around is just lowering the opacity to almost zero and making lots of little strokes. I love the portability and the fact that I can use it with or without a stylus. Like the title of this post suggests – I never used my stylus to paint this image – only my finger. I was surprised that after a while my finger did actually get a little tender but was fine the next day. My goal was to see how far I could take a digital painting using only my finger. I guess you could say I gave my ipad the finger :)…in a good way. I think I still like it better with the stylus.  With the ability to zoom in and out so quickly – fixing and smoothing line work was a snap.

The iPads are still wonderful fo digital painting

I still enjoy digital iPad painting however I feel that the perfect tablet for me would be about half again bigger than the this ipad size. And pressure sensitivity would be nice too. I think there are better ways to paint digitally but this works. As more and more artists and especially illustrators are switching to digital painting, there are more and more devices and apps and programs to make it even easier. I love it.

For art lessons online, be sure to visit FolioAcademy.com  :)


Ebook; from Idea to Publish to Prosper, I Hope

Ebook: Think, Write, Paint, Publish.

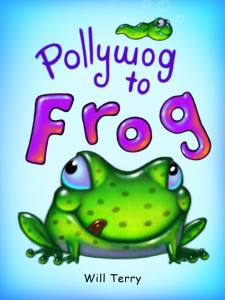
I released another ebook on Barnes and noble.com! My other books were really encouraging. And I wasn’t sleeping anyway. So behold, Pollywog to Frog.

0011a

Two Things I really like about Ebooks

1) I love to draw fun simple little characters

2) I like to be able to pay my bills.

Publishing my own ebooks in my “spare” time allows me to do both. I carry my sketch book everywhere and so if I’m not writing I’m sketching and vice versa. Pollywog to Frog was written in the few hours I have in-between the two college classes I was teaching and the digital paintings were done in-between assignments. And oh yeah, an ebook costs so little to publish. Now anyone can compete with the big publishers.

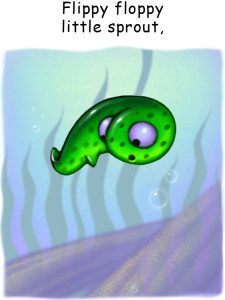
ebook graphic, a little polliwog, Flippy floppy little sprout,

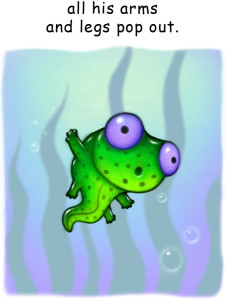
ebook graphic, a little tad-pole, All his arms and legs pop out.

Ebooks: How to make money as an artist.

One of the best things we can do as artists and business people is develop passive streams of income. The ability to earn money while you’re sleeping, playing, or working on other projects is a really cool thing. I’m already working on my next ebook.

If you can’t write an ebook, find someone who can

If any of you feel comfortable illustrating but not writing and would want to work on producing an ebook, ask around, everyone knows someone who wants to write a children’s book. Find a friend or relative, (Can relatives be friends?) to work with. If that doesn’t work, I have a professional well known author who would love you to take one of his manuscripts and turn it into an ebook. And my buddy, also known as my brother in law is probably still available to take the finished jpeg files and produce the epub files necessary to publish your work. Just email me off list if you’re interested: willterryart@gmail.com

Stay tuned for some Shameless Marketing below

5 ebooks that I recommend

So my three little claims to ebook fame are: Monkey & Croc, Tickle Bugs and Pollywog to Frognone of which have made the New Your Times best seller listA young friend of mine, OK, Wayne’s daughter, has written two ebooks. I Love Chickens Eggs and Baby Chicks and When I Grow Up, I Want to be a Frog, and she is just a little girl. I think I told you this in my last post, but Hey! I want to encourage you.

PS Learn how to draw and paint, and other fun art skills at FolioAcademy.com.

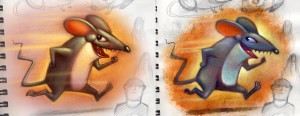
Digital Art work vs Traditional Acrylic Painting

Can you tell which is digital art and which one is Acrylic paint?

Digital Art work of a speeding rat vs a Traditional acrylic painting of the same rat


Digital Art work on the Left vs an Acrylic Illustration on the Right

Pretty cool huh? Check out the texture on the Digital Art (left).

This little mouse, or rat, (depending on what YOU want it to be, (I want it to be a mouse, with teeth) was just a little doodle in my sketchbook that I ended up painting in Photoshop a while back. I posted it just a week or so ago talking about how you may want to make the switch. I also painted it the old fashioned way for an art demonstration for my Media and Techniques class at UVU. I used my dry brush, technique using acrylic paints. I just thought it would be kind of neat to do a side by side comparison.

I paint so dry that I just lightly put some Liquitex heavy gel medium down right in my sketchbook and painted him there. I used to like having a few paintings in my sketchbook – That way I always had a few finished pieces with me wherever I would go. Now of course I carry my i-pad and always doodle, digitally of course, and have a regular portfolio with me all the time. It sucks when you lose it at the airport though. Yes that happened, well almost happened. I went back to where I was sitting and an hour later, it was still there. I am a grateful man.

It is starting to look like I like to paint digitally. I have a secret. I have converted. But don’t get me wrong, I still love a real painting,and if I were to do gallery work, it would be a must. I just really like the switch that I’ve made.

You can learn how to paint digitally at FolioAcademy.com and you can learn my dry brush acrylic technique there too.

Digital Painting, Illustrate in Photoshop

This, How to create Digital art, Painting in Photoshop got things going.

Digital painting in Photoshop. Art lesson by Will Terry


The digital transition was hard for me. But worth it.

Back in the day, I had such a great response to my “How to Illustrate Children’s Books” video series that I decided to make another series that explains in detail how I paint with digital paint in Photoshop. I had many requests over a number of years. to actually make a tutorial on painting in acrylic but I never got around to it. Well not at the time, so about a five years ago I was introduced to digital painting by Jed Henry – he was young illustration graduate and promising new upstart (He’d already sold two books to major New York Publishers. His generosity in helping me learn how to re-create my acrylic style digitally will never be forgotten! So I’m glad to report that I finally got around to doing a tutorial in acrylic painting the old fashioned way too. It was tough because I am so converted to digital illustration now.

Before Folio Academy I was Teaching Illustration at a University.

I was teaching at UVU, AKA Utah Valley University, and BYU. I wanted to show some technique on video so my students could log into a demo at their leisure. When the first one was such a success I decided that my peeps may want this one too. Little by little, my best friend Wayne and I created FolioAcademy.com.

Any who…

In this video series I go from sketch to finish, describing processes like: making and importing a texture, under-painting, value, brushes, layering, design, and many other aspects of coming up with your own personal way of thinking and working. If you want to know how I paint from start to finish you might be interested in these videos.

Just to be clear – these videos are not a general “How To” in Photoshop but rather a “How Will Terry fumbles his way into a digital painting with a very limited knowledge of Photoshop” In other words you could say these are Photoshop videos for dummies like me. I try to use as few tools as possible because part of my philosophy is simplicity and reduction lead to purity and essence.

Above is the digital painting that I start and finish in the videos so if you hate that painting DON’T BUY THE VIDEOS! :) Click here to purchase the video.

A QUICK LITTLE DIGITAL PAINTING OVER A QUICK LITTLE PENCIL SKETCH

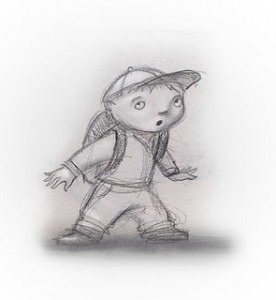
Two Hour Pencil Sketch, Painted in Photoshop

Folio boy will Terry draws in pencil & Paints in Photoshop.

little Boy painted in Photoshop little Boy sketchSince I have been telling lately about my transition from acrylic to digital illustration, I thought I would post these little After and Before pictures ot a sketch I drew then painted in Photoshop. In the beginning I was able to get a handle on the digital painting a lot faster than digital sketching and designing the drawing. So I would do a basic drawing and then finish it in Photoshop. I also enjoy a lot of the play between the pencil drawing and the painting. I left a lot of the hatchy, sketchy, pencilly, lines shining through the paint, on purpose.

This little study took me just two hours to complete and was a lot of fun.


Scanning, Re-Sizing, Resolution, & Pixels in Photoshop

Getting the size and resolution right in Photoshop

This is mostly for beginners but a valid subject.

Scan your art or sketch and work in Photoshop to finish, paint or add color.

For those who sketch or start their artwork on paper but like to work in Photoshop

This is a question that we still get a LOT, so we want to address it.

Step by Step 

Scan your sketch or artwork into Photoshop at 150-300 pixels per inch.

Make sure Constrain Proportions is checked

Make sure Resample image is checked.

Set your pixels per inch to 300 pixels per inch.

Decide what size you want the printed piece to be and set your size. I.E. 8”x10”

There are a few things to be aware of when sizing a piece in Photoshop.

Get your Height, Width and Resolution right.

Get it into Photoshop and go to image then image size and just look at it.

Go down to Resolution in the Document Size area and see what you’ve got. If it says 150 pixels per inch, then that is how many pixels equals 1 inch in the resolution of your painting. Above the RESOLUTION there are the two Width and Height boxes, you want those in inches not pixels, so change that if you need.

Above that there are the Pixel Dimensions, this is the total number of pixels, not pixels per inch but per the entire piece. Set your width and Height to Pixels.

Make sure Scale to Style, Constrain Proportions and Re-sample Image are all checked. Like so.

Pixel Dimensions

Width      [big number]           Pixels

Height     [big number]           Pixels

Document Size

Width         [     8.5     ]            Inches

Height        [    11       ]            Inches

Resolution  [    300     ]          Pixels/Inch (Pixels per Inch)

[ x ] Scale Style

[ x ] Constrain Proportions

[ x ] Resample Image

Printers and publishers usually want everything to be at 300 pixels per inch.

They also want it to be so many inches, like 8×10″ for example.

You want your illustrations to look good. So…

Increasing the Resolution does not increase your resolution.


Set the parameters and get the scale right in Photoshop

Now that you are working on your sketch in Photoshop, you want to set the parameters and get the scale right.

Screen resolutions is about 72 dpi, (Dots Per Inch, or Pixels Per Inch)

There is nothing you can do to increase the actual information that you have. If you take a small picture scanned in at say 75 DPI and blow it up, it won’t give you ANY more detail. Like a projector, if you back it up and make the image on the wall bigger, the image will not be any more clear, just bigger. So Ideally, when you work, you want your finished piece to be big and clear, you can always make it smaller. Don’t go too big it takes longer for your computer to render.

If you have an 8×10 piece scanned in at 150 and you just change your Resolution to 300, it doesn’t actually change the resolution of your work and leave all the other parameters the same. It will decrease the size of your piece.

The reason I set my scanner at 150 instead of 300 is because I don’t need too much detail to go from a sketch to a finished piece, so I scan it in at 150 then change it to 300, then I work in 300 dpi so my finished piece will be acceptable for the printers, and it will have the detail and clarity that it needs for the size that it will be printed.

So you want your width to be the right size for the printer, say 8 by 10”.

You want your resolution to be 300.

Now you can zoom in on your work and zoom out without changing the end size or resolution.

Make sure Constrain Proportions is checked. 

[ x ] Constrain Proportions wants to be checked so that if you change the width, the height will change proportionally and vise versa. If you want the width wider but want the height to stay the same, if you just change the width, it will skew your art, so it would be better to keep your proportions, so you should just size it bigger and cut some off.


MAKE SURE resample image IS CHECKED.

[ x ] Resample Image is important so that if you change your work from 150 pixels per inch to 300, it will boost your actual pixels per inch as well. Otherwise, with Resample image unchecked, you could change your work from 150 to 300 Pixels per inch and  size of your work will drop to compensate for the change. Now when you go to ship that finished work to the printer, your 8 by 10” piece will be more like 4 by 5”, and that is not good. You Cannot just make it bigger with out making it all pixilated and blurry and crappy.

What a publisher wants

Most publishers want your work to be at least 100% of what they want to printed piece to be. 8-9” by 10-11” and at 300 pixels per inch.

 Have fun with it, explore. 

Fool around with some of these and see what happens to your image and the other perameters when you make changes with Constrain Proportions and Resample image checked and unchecked.

The danger is that you can be working along and not realize that your pixels per inch or your resolution or your document size is way too small until you are finished. And that is a painful lesson. Ouch!


for more info on this same thing, watch this video by Will Terry.
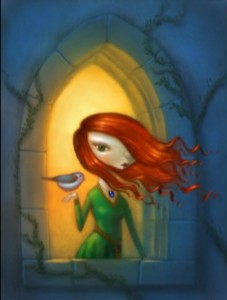
Photoshop Speed Painting of a Damsel in a Tower

Fairy Tale, Digital SpeedPainting of a Beautiful Girl in a Tower

Video looks better with the right music

Damsil

This little speed painting is set to a Tori Amos tune that makes this little digital speed painting look a lot nicer. It’s funny how the audio can make the picture that much nicer. If you don’t know what I’m talking about, watch this again with out the sound. Notice when you are watching a movie trailer or preview, the sound makes you want to watch the movie. try watching a few previews with the sound off, you will see what your not hearing. It isn’t as pretty.

Painting (with Photoshop) Just for Because!!!

I love my work and I love the projects I’m working on but sometimes I get an urge to create something different and that feeling will gnaw at me until I stuff it with a free painting day.This was a sketch I did while in church (of course I was listening – shut up and just don’t ask what the sermon was about) and I thought it would be fun to record it and set it to music – I was right. I’ve always loved this Tori Amos song too and it makes the speed painting look a lot nicer. I’m still loving Photoshop… but it made me want a bigger, badder, meaner, stronger, faster, (six million dollar) computer… and a Cintique. Which by the way, I now have. And I am loving that too. And since it is for my (art) business, it’s tax deductible. (I am not a tax pro and this is not tax advice, please contact your tax professional for any tax deductions of which, you may be entitled. And there are a lot. I think) That being said, be self employed, it’s worth it, I guarantee it. (that is not a guarantee)

Your friend Will Terry of Folioacademy, art lessons online.

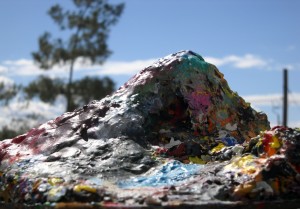
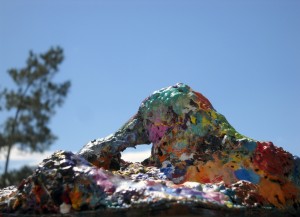
Mountains of Paint on a Pallet – Years of Buildup a Work of Art

Mountains of Paint: Artist’s Paint Pallet, a Work of Art

I seldom use my pallet or acrylic paints any more

palette (5)

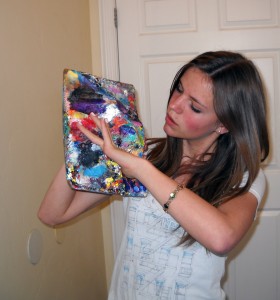
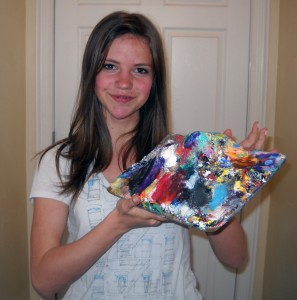
Since I went mostly digital, I hardly ever use my brushes, my paper towels or even my beloved pallet. Beloved you say? Well, my pallet is like an abstract painting that is 20 years in the making. I still love painting in acrylic, it’s just that digital painting is so much easier and faster now. There is something to be said for traditional painting. The smell of oil, the finished work, paint on canvas is so timeless and original.
So I’m feeling bad because I just don’t add to this creation any more.
What started out as an insignificant piece of Masonite that I pulled out of the trash,
turned into this big thick clump of endless layers of acrylic paint.
layers of paint since 1990 
a painter's pallet, years of acrylic paint build up. Makes for a 3-D piece.So I was looking for something I could blog about and then it occurred to me – my pallet! This mound you see before you is constructed out of all of the acrylic paint I’ve used since 1990! It started out as my friend Wayne’s Masonite oil pallet. Wayne thought his pallet was too big so he cut it in half and tossed my half (the piece you see) in the trash. Way back then it was just a flat piece of 1/4 inch board. When I pulled it out of the trash and started using it as my acrylic pallet it began to grow.


Don’t Throw it Away! It’s got Character.

palette (9)


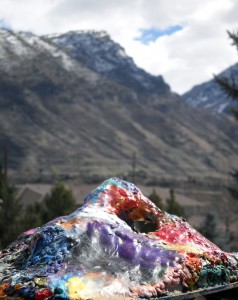
There was a time when I was going to discard it – it was growing out of control and I thought it would be easier to work on a new one. In fact I did carve some off a few times. But then I looked at it again – all bumpy, colorful and lumpy, Full of character and personality, We’d been through a lot together. “There there lil’ fella, don’t you worry – daddy isn’t going to abandon you like Wayne did.” (can you tell it’s 2:00 AM?)


He’s been around too

palette (10)So here he is – I figure he’s probably middle aged like me – lots of miles, like me and many more ahead, like me, (I hope). He’s been to Maryland, California, technically Nevada and Idaho, but mostly he’s lived here in Utah. Of the thousands of paintings I’ve done he’s got parts of all of them in him.
 I think I’ll name him Benjamin since I never had any run-ins with anyone named Benjamin.

There is an arch in there

palette (6)Oh, and that arch you see was at the request of my children constantly nagging me to sculpt some form into him – It took about 9 months to build the arch. Sometimes you just gotta ask yourself, “What would Dr. Seuss do?” I think his pallet would look a lot like Benjamin.

Illustration Demo for BYU Art Students

Art Demonstration for an illustration Class at BYU

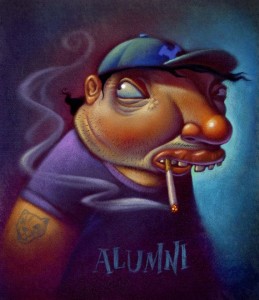
 I may offend them with a BYU alumni overweight, and smoking!

I was asked by Greg Newbold to do a demo in his illustration classes… so I racked my brain to come up with something that would be FUN but non-offensive to the students. Well not TOO offensive.

Behold! the sketch I came up with. Fun? Offensive? Art?

I really like this sketch and I’m going to paint it but I’m concerned that the student’s might not like that I’ve decided to portray a BYU alumni overweight. And as many of you know, they don’t smoke, so I am taking a little risk here. Not to worry, they may be Mormons but they aren’t that uptight.  :)

Finished, Acrylic paint over Photoshop printed background.

Six hours to paint it

BYU alumnusThis is the finish art demo: It was a lot of fun working on it and talking to students. I was happy that they thought it was funny… or at least, didn’t beat me up for poking fun. I worked on it in class for about 4 hours and spent an additional 2 at home with a few finishing touches.


Digital Stage, no lighter than 50% value.

This is the beginnings of my digital stage where I Scan in my sketch, take that into Photoshop and airbrush some smooth, basic colors and keep them kind of dark. My main concern is getting everything no lighter than about 50% value.

Using Photoshop I spent about 20 minutes laying in shadows and basic foundation colors. Then I printed it on watercolor paper. The next step in this method was to stipple a layer of acrylic gel medium over the print. I use a kind of short hair paint brush and a little Gel Medium at a time and stipple it onto the paper, giving it millions of little tiny peaks. Aka tooth. The gel drys clear so you can paint with acrylics right over it. Building up the lighter areas. And of course saving the highlights for last.


PHOTOSHOP PLUG IN DOES THE WORK FOR YOU

New Photoshop Tool Makes Painting TOO Easy to Believe

Christmas Card

I know we don’t usually post on a Tuesday but this is a special occasion that can’t wait. This new plugin is SO usefool, You would have to be a fool not to look at this new Photoshop tool. Some wonder if computers are going to make it too easy. We will have to compete with every fool out there that can afford a PC and Photoshop.

Watch this short Demo video while Mr. Folio Academy, Will Terry shows you how easily he just painted this beautiful digital creation of Santa Claus on a snow board.


You probably want to know where you can get this cool plug in and how much it’s going to cost. They say that the right tools don’t make you an artist but I am starting to think that this is all I need. I am so greatfool for this new plug in. The cool thing is, the company that created this affordable plug in is working on another one that is equally helpfool. It does most of the drawing for you. It will be released 04/01/2015 a year from today. Happy april fool’s day.

Comments welcome.