Successful Artists have FUN while They Create

Have FUN while you create your artwork for more success

sketch, monster hiding behind the shower curtainI am a successful artist, Why? Because I enjoy what I do.

“Learn to love work and you will love life.” ~L Carl Andreason. “Find a way to make money doing what you love, and you will love work.” ~G. Ken Nuttall


Successful artist having a blast

I am having a blast working on this little project – I’m not sleeping much lately because I’m busy doing real stuff too, but I am having fun, or at least, that’s what I keep telling myself. As I get older I realize that we only have a short window to make it happen – whatever “it” is. I love the challenge of developing good instruction for my college classes, pleasing my freelance clients, pleasing myself on personal projects and my continued involvement on the day to day workings of Folio Academy.

I found a programmer and animator to help me see this picture book become an app, and see this vision through – I’m having so much fun – at work!!!

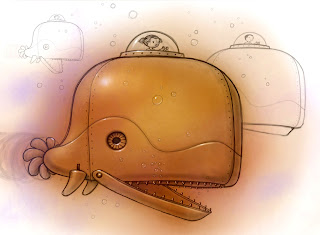
I am calling this project, “Monster App”

I’ll be Making my E-Book into an App too

I am going to make this E-book into an App too

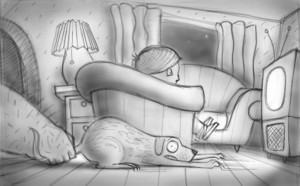
monster pulling dog by the tail sketch for app

I’ve decided to make this e-book (see last blog) that I am working on into an iPad and iPhone app as well. Here is another sketch for the ipad/iphone app I did awhile ago.

I do not have a programer yet – have talked to a few but I want to find someone who believes in my project enough to go all in with me and share the loot we most certainly will rake in.

“We’re going to need a bigger rake!” This is certainly another leap of faith but I’ve found that if you have a dream and can see – really see the vision of it, you should go for it! I’ve been learning this over the past year and have enjoyed a fair amount of success with this method of working. I’m sure I’ll have my fair share of failures – wait – I’ve done that:

My Failed books: “The magical world Inside Abandoned Refrigerators”, “Daddy Drinks Because You Cry”, and “You Are Different and That’s Bad”…..ok ok – I lifted these from the internet but you get the picture. I’ve had failures and I’ll have more and you know what? That’s OK.

I will try to post my updates on this each week, thanks.

for more help with your art, visit us at folioacademy.com

iPad Painting on my iPad with the Artrage app

Digital sketching around on the iPad with the Artrage app.

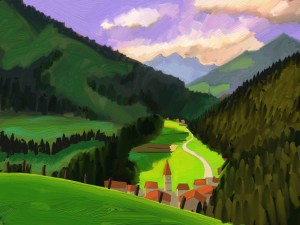
iPad Painted Landscape

Having good times and a lot of fun with the “Artrage” app on my iPad. I like it for mimicking lush buttery oil paint without all the mess and clean up. I also like iPad painting for the ability to “dry” the painting so you can work on top of the thick paint you already put down. The wet into wet or alla prima simulation is almost unnerving in how real it feels.

An artist should constantly practice their trade.

When you have some free time, pick up your sketch book, iPad or what ever device works for you, and doodle, sketch, draw, paint. The world will be better place.

I used to love to get my feet wet, or maybe I should say, my hands dirty with PAINT. Oil painting was fun, and still is, water coloring is very rewarding and the finished product of real paint on canvas is more valuable. But, I am an illustrator and time is of the essence, so I usually work digitally now.

iPad painting, with my Finger

iPad Painting; Finger Painting on the iPad

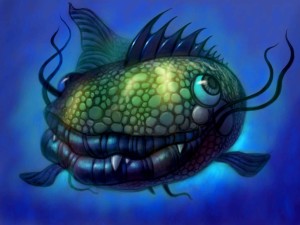
finished pic of a strange fish ipad painting by Will Terry

Complete with color.

iPad Painting is too fun. I’m having way too much fun with the “brushes” app fro painting on the ipad. I painted this at a doctors office and in the car waiting for my son and a little while watching old episodes of “The Office” on NetFlix with the fam. My favorite Michael Scott line: “Would I rather be feared or loved?…I want people to be afraid of how much they love me.”


iPad Painting & the lack of Pressure Sensitivity

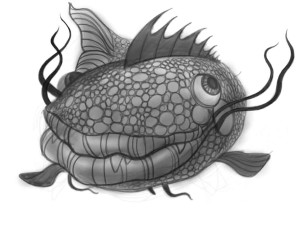
ipad painting/sketch of the strange fish by Will Terry finger painting

Black and white finger painted on the iPad

But back to ipad painting – while the touch screen leaves many to complain about the lack of pressure sensitivity I find that an easy work around is just lowering the opacity to almost zero and making lots of little strokes. I love the portability and the fact that I can use it with or without a stylus. Like the title of this post suggests – I never used my stylus to paint this image – only my finger. I was surprised that after a while my finger did actually get a little tender but was fine the next day. My goal was to see how far I could take a digital painting using only my finger. I guess you could say I gave my ipad the finger :)…in a good way. I think I still like it better with the stylus.  With the ability to zoom in and out so quickly – fixing and smoothing line work was a snap.

The iPads are still wonderful fo digital painting

I still enjoy digital iPad painting however I feel that the perfect tablet for me would be about half again bigger than the this ipad size. And pressure sensitivity would be nice too. I think there are better ways to paint digitally but this works. As more and more artists and especially illustrators are switching to digital painting, there are more and more devices and apps and programs to make it even easier. I love it.

For art lessons online, be sure to visit FolioAcademy.com  :)


I Found the PERFECT Stylus For Drawing and Painting on iPad – Procreate App

Finaly! The Perfect Stylus For Doing Your Art on iPad

ARtist, Will Terry used to use His finger to create art on his iPad
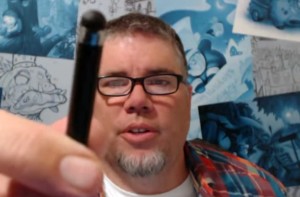
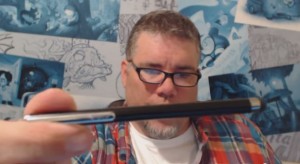
Will Terry displays his favorite stylus

I use a fat bulbous stylus

I have found the perfect stylus for drawing and painting and doing all that digital artwork on my iPad. Using a Procreate drawing app. I used to use my finger, in Photoshop and in Procreate. As you know, the best stylus is the one you have with you and you should always have your fingers, or at least one of your fingers with
you. I have changed my mind since I’v found this. See the pictures.

How can this bulbous pointed thing be a good stylus?
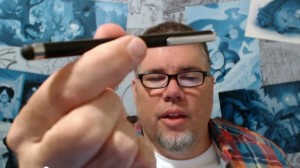
000 Stylus 02But when you draw with something blunt like this, you are less likely to get that into detail too soon. Like if you are painting, William Whitaker says you should go for the biggest brush you dare to use and then grab one a little bigger.

So with this bulbous, fat, blunt stylus, I just start drawing.
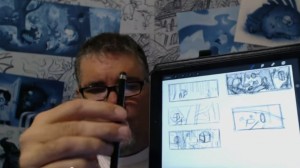
Artist Will Terry displays a few sketches on his iPad

See sketches there to the right.

I first come up with a few sketches, doing all my initial design for my images with the fat stylus right on my iPad or on my Cintiq monitor.


I turn my design into a composition.
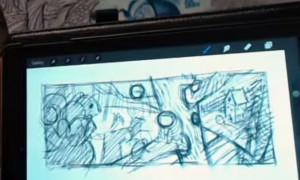
Composition on an iPad

My Simple Composition

Just like when you paint in Photoshop, you want to start with huge clunky brushes. All the realy great Photoshop artists use a big brush in Photoshop.


Then Work the Composition into a Painting
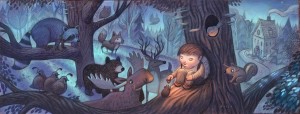
Digital Painting by Will Terry

The comp there, became THIS Painting which I just finished on my cintiq monitor. You may remember it from a previous post. See it here on my Cintiq monitor as well.
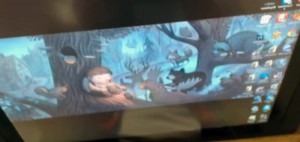
000 Stylus 06So when you are painting, Start with a big brush and when you are painting digitally, start with a big stylus like the one I use now instead of my finger.


This Fish King Painting was done with the fat Stylus
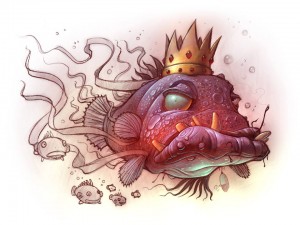
King FishThis Fish King Painting was done with this stylus that I displayed above. You may remember it from a previous post.

You can spend over $100 on a stylus

I am asked here at FolioAcademy,  ALL THE TIME, Will, What stylus should I get? What is the best one for me? Which one are you using? Should I get the one that has a little plastic tip? Or one with pressure sensitivity or virtual pressure sensitivity. (I don’t know about that, because it may be for you if your painting style requires some of that, and that could be a good one).

OK it may not be the very best Stylus, but it’s the best for me. 
000 Stylus 08

OK I admit I said I found the best stylus but I have to admit that it may not be the best for you. It probably is, however, you may be light years ahead of me and using one of those artsy, schmancy, pressure sensitive, new fangled,  expensive, high falutin types.

For me, the $12.00, blunt tipped, stylus you can get at Target or the basic store. I think I spent $12.00 on mine. And if and when it wares out or gets lost, I am not out a whole lot of money.

 Paint and Draw from General to Specific, Digitally and Traditionally

So to recap, you should know this already but if you don’t, you should start rough, and work from general to specific. That was drilled into us at BYU by the Dean of the Illustration Department, Robert Barrett, and he was right. After you get your painting blocked in, or your drawing roughed in, then you can go in and start picking out, or putting in, the detail. So many paintings are ruined because the artist starts noodling it to death and working on detail when the basic shapes and design are still not worked out or defined. In a word, use a fat stylus.

I will post a demo next week of a sketch to a nearly finished piece.


Billy Goats & a Troll, Three Blind (Pew) Mice, Illustration wit a Twist

 Put a new twist on an old idea

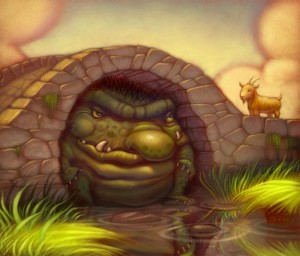
Why not make the troll HUGE!

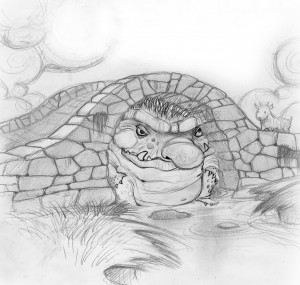
Troll SketchThis is an image for a fun little book project I was doing awhile ago and unless you just arrived on this planet you already know what the story is.
I had done another book project that was for a fractured fairy tale called The Three BULLY Goats. A cute little story where the goats were the bullies and the troll was kind and gentle.
I guess that led to me wanting to

illustrate another troll under a bridge with a goats story. I wanted to make an image that would bring a slight twist on the classic BILLY Goats Gruff tale and I thought that playing with the scale of the troll might make my piece more unique. I’ve always been puzzled when musicians re-make a well-known song yet fail to put their own artistry into the performance. I hope I can give this book freshness so that both adults and children can appreciate it.

CAN YOU TELL IF I PAINTED THIS TRADITIONALLY OR DIGITALLY?

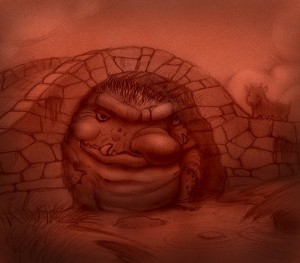
Part of my process has always been to work from a warm tone over the entire surface – and then I add tone to the shadow areas. Weather I used acrylics, oils or an iPad or other digital devices, I would still go from a toned canvas, to toned shadows to to the finished piece.

I combined two different sketches to get it right. 

I combined two sketches because I was having a hard time drawing the Troll where I wanted him in one sketch. I used Photoshop to get it right…and the painting was also done in Photoshop. – Brushes that never run out of paint! Undo! Copy Paste! Endless Adjustments! Speed! No Shipping Costs!

A new look at an old illustration

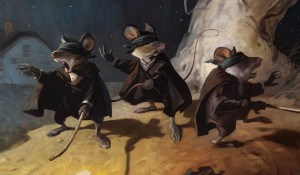
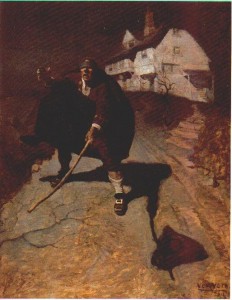
3 blind (pew) mice. A  new take on an old favorite by NC Wyeth called the Blind Pew.

0003 Jim M. 3 blind mice. A new take on an old favorite painting from NC Wyeth called the Blind Pew.
Artist Jim Madsen, (Wayne Andreason is his best friend) copied “Blind Pew” with a twist. He took an old favorite by NC Wyeth, the Blind Pew and put it to Three Blind Mice.

The Blind Pew ~NC Wyeth

NC Wyeth's illustration, the Blind Pew
Compare the mouse on the left and the house in the background. And the color pallet and painting technique. Although Jim’s is a digital painting. Way to go Jim.

Making the transition to Digital Art

So you want to draw and paint digitally but don’t quite know how to make the transition.

Digital artwork after taking a few digital courses

After Taking a few courses
by Lisa Lavoie

Digital art is increasing in popularity but where do we learn how to do it.

 Most artists start our creating art on paper. We were all children drawing on walls and furniture and our good mothers and fathers put paper in front of us and encouraged us to create our masterpieces thereon. They later hung those treasures on the refrigerator for the world to see and admire. And that felt good.

As we develop our craft, we get more and more comfortable with the tools we use. Now days we see so much artwork being created digitally and if we want to joining in, we have a whole new learning curve. But the benefits of certain features make the switch well worth it in so many cases. Features like, Undo, Blur, Copy and Paste, Re-size, Distort, Transparency, Layers and much much more make it so desirable to work online.

There is no replacement for practice of stick-to-it-ive-ness. Getting out there and fooling around with the tools and layers, and features. Using the tutorials is also a good idea. Once you get comfortable with the whole digi process, you should explore new ideas and textures as well. And bounce ideas off your friends and other artists. Will Terry had help from some of his students at first.

Sometimes all you need is a little instruction from others who have developed a their technique in the digital world.

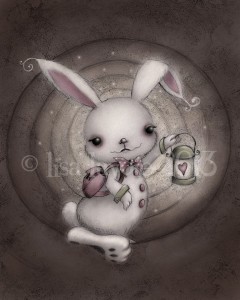
This is the kind of email we like to receive.  Creative Directrice Lisa Lavoie at lalatopia.com, is one of our happy fans who had this to say.

Hi Will!

Just wanted to say thanks for your Folio Academy courses – I’ve gone through several, but the painting and color ones were the most helpful.

Attached a pic of what my digital art looked like before + two pieces I just finished after watching your courses. Obviously my illustration technique had already progressed substantially  – but was getting nowhere trying to convert to a digital workflow that didn’t look awkward and digital. And now my digital art is even better than my real media pieces!

Thanks again :)

Lisa

Digital artwork before taking a few digital courses

BEFORE

Digital artwork after taking a few digital courses

AFTER

Thank you Lisa for your kind words. You have a really cool and unique style.

For those of you who are still reading, these are the digital art course we presently offer at FolioAcademy.

Five Quick Photoshop Tips for Illustrators by Dani jones. Justin Cooks three courses, Digital Inking and Coloring in Adobe Illustrator, Digital Inking And Coloring in Corel Painter, and Learn To Draw Cartoon Zombies. And a few by Will Terry like, Digital Painting in Photoshop 1 and part 2, Painting on the iPad, and Beginning Photoshop for Digital Painting.


How To Make A Story App – Step 6

How To Make A Story App – Step 6

scroll down or click links for step one, two, three, four, five and five.5

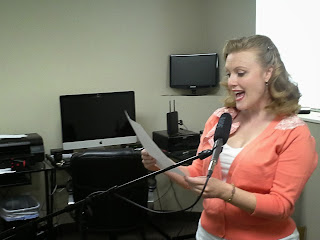
 Record the voice narration.

Hire a professional voice actor or do it yourself. 

On my last app “I Eat You” I used the iPad app “Tiny Vox” to record my own voice – making all the crazy fish voices and generally making a fool of myself. It was fun but now I’m in app making 2.0 and for Gary’s Place I decided to hire a professional!

On your first you may want to boot strap it and find free voices.

But back to Tiny Vox – wow! what a cool app for only a couple of bucks. If you’re on a budget you can get good clean sound tracks with this little gem. The built in noise cancellation leaves the front and back end of your sound clips hiss free.


But I got really lucky that I ran into Tabitha Thompson from a class I taught. She was looking into the whole process of leveling up her illustration skills as she’s already a talented writer. I mentioned that I was looking for voice work and she said she would love to provide a sample – it was amazing – I only found out after the recordings that she was trained professionally. It pays to open your mouth.

Tabitha Thompson has an advanced-level degree in theater from Cambridge, England, and has worked as a professional actor, singer, and dancer since 1989. You can contact or email her at tabitha.voiceact at icloud dot com. (it’s in code to save her from SPAM


It may affordable to hire a professional voice actor. 

Then I worried that I wouldn’t be able to afford her – but her rates were really reasonable – so I paid for 3 hours of her time which included driving down from Salt Lake. Then I paid for an hour of time with a sound studio. Since I’m in app creation 2.0 I wanted to leave no stone un-turned. If that figure of speech works for that. My goal in making this app is to give reviewers, moms, dads, kids, peers, very little to find fault with.  I tried to give as little input as possible during the recording since I’m really just an illustrator. I told myself, “Let Tabitha feel free to explore her art as you enjoy being left alone to explore yours.” The result was really fun. Being the professional she is -she nailed it on the second take. I only asked her to re-read a few lines twice and as she wouldn’t have understood without seeing the illustrations.

I used a professional sound guy as I wanted the best quality.


The sound guy (Ryan Haldeman part of the “kid history – youtube” team and part of the FolioAcademy team)  used wetransfer.com (my favorite large file sharing site) to send me the voice recordings. Then I used Audacity to cut the long sound files into page segments. We all thought it would make a better product to have Tabitha read the entire manuscript – rather than break each page for my convenience. I think it gave her a much better flow and rhythm…and it’s super easy to cut the file on your PC or Mac.

Audacity is a free program you can download and you can learn what you need in about 20 min by watching various youtube videos. Want to learn how to cut a file? Just ask youtube: “how to cut file audacity” then watch a 5 year old lay it out – could you have predicted this 20 years ago? Ha! Oh – one little trick with Audacity. You’ll want to export your files in mp3 format (if you’re working with Kwik) – BUT Audacity can’t do that for you because of the pesky royalty Audacity would have to pay to let you do that – instead – try to export to mp3 from Audacity anyway – Audacity came up with a link when you try to save that takes you to a 3rd party web page where you can download a tiny program that works behind the scenes with Audacity to magically create mp3 files – in fact after you install that second program you can just export mp3s right from Audacity.

Stay tuned as I’ll keep sharing my progress on “Gary’s Place” which I plan to submit to Apple, Google, Amazon, etc. in a few weeks. I’ll continue to blog about this process even sharing my sales stats when it hits the various app stores! If you’re wondering where the first steps are I started this project a while back, in September 2013 I think. so just scroll down or click the following links and you can check out my other steps.

Now available, Step 7.
here are the links for step onetwothreefourfive and five.5

IMAGINATION & VISUAL LITERACY CLASS

Artist Will Terry is still teaching.

I’m teaching a class called “Imagination & Visual Literacy” at UVU right now. I love this class. It’s all the good stuff. I think I learned more than my students in developing the curriculum. If you want to learn something, try teaching it.

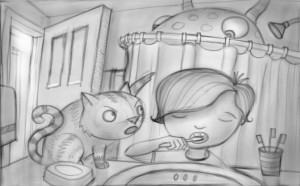
The Assignment, Draw a cat.

Above is my attempt at the in-class assignment yesterday. Draw a cat looking out of a bedroom window and include 25 items in the room but put all of the emphasis on the cat in 45 min. Since it was a drawing – students couldn’t use color for emphasis which is one of the easiest ways to accomplish this task. High contrast and crisp lines were all they could use.

I drew the above image along with them on my iPad hooked to the LCD projector. I like creating problems that I would also like to solve – why should my students have all the fun?

PROCREATING! ER UM…CREATING IN PROCREATE

I created this image using Procreate on my iPad – I love this app!

Link to FolioAcademy.com Digital art tutorials

I just got back from the SCBWI Southern Breeze conference in Atlanta. I was being entertained by Dianne Hess (editor at Scholastic) as she gave her speech – an inside look at her company. I have to draw to listen so I was on  my iPad using “Procreate“. It’s my go to program for creating all of my sketches now – I love the screen rotation feature and the larger file sizes. Oh yeah – and I’m still only using my finger. I find it fascinating that it bothers people that I won’t go out and drop coin on a stylus. It bugs my students, friends, and strangers that I meet – like the guy who sat next to me on the plane. “You know you can buy all kinds of styluses for that device,” he informed me…I just agreed….by the way it strengthens my resolve to run sans stylus with each criticism.

A special shout out to Elizabeth Dulemba for inviting me to speak, being a great host, running an awesome conference, and being a great illustrator. I met so many cool people down there – too many to list but you know who you are! I hope to be able to get down there again sometime.