A QUICK LITTLE DIGITAL PAINTING OVER A QUICK LITTLE PENCIL SKETCH

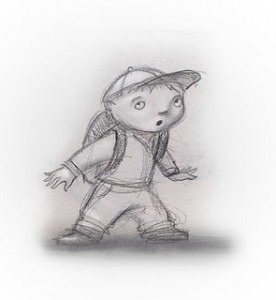
Two Hour Pencil Sketch, Painted in Photoshop

Folio boy will Terry draws in pencil & Paints in Photoshop.

little Boy painted in Photoshop little Boy sketchSince I have been telling lately about my transition from acrylic to digital illustration, I thought I would post these little After and Before pictures ot a sketch I drew then painted in Photoshop. In the beginning I was able to get a handle on the digital painting a lot faster than digital sketching and designing the drawing. So I would do a basic drawing and then finish it in Photoshop. I also enjoy a lot of the play between the pencil drawing and the painting. I left a lot of the hatchy, sketchy, pencilly, lines shining through the paint, on purpose.

This little study took me just two hours to complete and was a lot of fun.


Scanning, Re-Sizing, Resolution, & Pixels in Photoshop

Getting the size and resolution right in Photoshop

This is mostly for beginners but a valid subject.

Scan your art or sketch and work in Photoshop to finish, paint or add color.

For those who sketch or start their artwork on paper but like to work in Photoshop

This is a question that we still get a LOT, so we want to address it.

Step by Step 

Scan your sketch or artwork into Photoshop at 150-300 pixels per inch.

Make sure Constrain Proportions is checked

Make sure Resample image is checked.

Set your pixels per inch to 300 pixels per inch.

Decide what size you want the printed piece to be and set your size. I.E. 8”x10”

There are a few things to be aware of when sizing a piece in Photoshop.

Get your Height, Width and Resolution right.

Get it into Photoshop and go to image then image size and just look at it.

Go down to Resolution in the Document Size area and see what you’ve got. If it says 150 pixels per inch, then that is how many pixels equals 1 inch in the resolution of your painting. Above the RESOLUTION there are the two Width and Height boxes, you want those in inches not pixels, so change that if you need.

Above that there are the Pixel Dimensions, this is the total number of pixels, not pixels per inch but per the entire piece. Set your width and Height to Pixels.

Make sure Scale to Style, Constrain Proportions and Re-sample Image are all checked. Like so.

Pixel Dimensions

Width      [big number]           Pixels

Height     [big number]           Pixels

Document Size

Width         [     8.5     ]            Inches

Height        [    11       ]            Inches

Resolution  [    300     ]          Pixels/Inch (Pixels per Inch)

[ x ] Scale Style

[ x ] Constrain Proportions

[ x ] Resample Image

Printers and publishers usually want everything to be at 300 pixels per inch.

They also want it to be so many inches, like 8×10″ for example.

You want your illustrations to look good. So…

Increasing the Resolution does not increase your resolution.


Set the parameters and get the scale right in Photoshop

Now that you are working on your sketch in Photoshop, you want to set the parameters and get the scale right.

Screen resolutions is about 72 dpi, (Dots Per Inch, or Pixels Per Inch)

There is nothing you can do to increase the actual information that you have. If you take a small picture scanned in at say 75 DPI and blow it up, it won’t give you ANY more detail. Like a projector, if you back it up and make the image on the wall bigger, the image will not be any more clear, just bigger. So Ideally, when you work, you want your finished piece to be big and clear, you can always make it smaller. Don’t go too big it takes longer for your computer to render.

If you have an 8×10 piece scanned in at 150 and you just change your Resolution to 300, it doesn’t actually change the resolution of your work and leave all the other parameters the same. It will decrease the size of your piece.

The reason I set my scanner at 150 instead of 300 is because I don’t need too much detail to go from a sketch to a finished piece, so I scan it in at 150 then change it to 300, then I work in 300 dpi so my finished piece will be acceptable for the printers, and it will have the detail and clarity that it needs for the size that it will be printed.

So you want your width to be the right size for the printer, say 8 by 10”.

You want your resolution to be 300.

Now you can zoom in on your work and zoom out without changing the end size or resolution.

Make sure Constrain Proportions is checked. 

[ x ] Constrain Proportions wants to be checked so that if you change the width, the height will change proportionally and vise versa. If you want the width wider but want the height to stay the same, if you just change the width, it will skew your art, so it would be better to keep your proportions, so you should just size it bigger and cut some off.


MAKE SURE resample image IS CHECKED.

[ x ] Resample Image is important so that if you change your work from 150 pixels per inch to 300, it will boost your actual pixels per inch as well. Otherwise, with Resample image unchecked, you could change your work from 150 to 300 Pixels per inch and  size of your work will drop to compensate for the change. Now when you go to ship that finished work to the printer, your 8 by 10” piece will be more like 4 by 5”, and that is not good. You Cannot just make it bigger with out making it all pixilated and blurry and crappy.

What a publisher wants

Most publishers want your work to be at least 100% of what they want to printed piece to be. 8-9” by 10-11” and at 300 pixels per inch.

 Have fun with it, explore. 

Fool around with some of these and see what happens to your image and the other perameters when you make changes with Constrain Proportions and Resample image checked and unchecked.

The danger is that you can be working along and not realize that your pixels per inch or your resolution or your document size is way too small until you are finished. And that is a painful lesson. Ouch!


for more info on this same thing, watch this video by Will Terry.
Head, Stone: Speed Painting in Photoshop

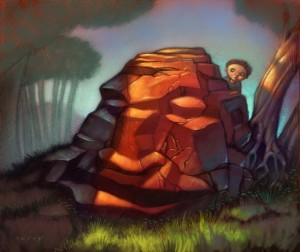
Things Happen When you Just Start Drawing

I was sketching in my sketchbook and this just kind of happened…

0008 prehistoric headstone

I hadn’t ever painted a pile of rocks before so of course I had to find out what it would look like in color. I say paint but of I used Photoshop. It still feels like acrylic painting to me. Then the next logical step was to make it into a video. I sent it to my sister Beth who said its boring, “make it cool or something, you need to make something move, it’s a video after all”. So I did, be sure to watch the end. And no, it doesn’t wink. (spoiler alert!) That is an inside joke for all those who actually watched my Giant speed painting video a week or two ago. Plus, a pile of rocks that looks like head, cool  huh? I have no idea what is buried beneath but it’s probably something way cool. I don’t know who the kid is either, probably someone way important – seriously – weird things happen when you just start drawing.

Photo shop speed painting, a quick demo of digital painting online

PHOTOSHOP PLUG IN DOES THE WORK FOR YOU

New Photoshop Tool Makes Painting TOO Easy to Believe

Christmas Card

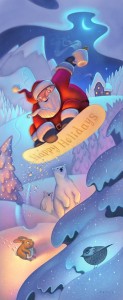
I know we don’t usually post on a Tuesday but this is a special occasion that can’t wait. This new plugin is SO usefool, You would have to be a fool not to look at this new Photoshop tool. Some wonder if computers are going to make it too easy. We will have to compete with every fool out there that can afford a PC and Photoshop.

Watch this short Demo video while Mr. Folio Academy, Will Terry shows you how easily he just painted this beautiful digital creation of Santa Claus on a snow board.


You probably want to know where you can get this cool plug in and how much it’s going to cost. They say that the right tools don’t make you an artist but I am starting to think that this is all I need. I am so greatfool for this new plug in. The cool thing is, the company that created this affordable plug in is working on another one that is equally helpfool. It does most of the drawing for you. It will be released 04/01/2015 a year from today. Happy april fool’s day.

Comments welcome.

Billy Goats & a Troll, Three Blind (Pew) Mice, Illustration wit a Twist

 Put a new twist on an old idea

Why not make the troll HUGE!

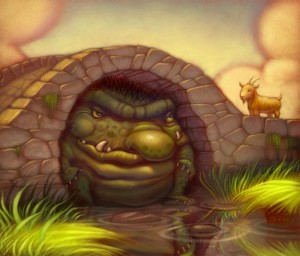
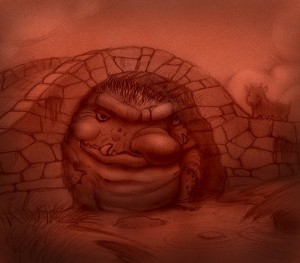
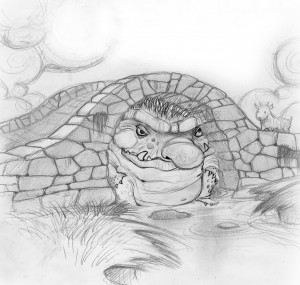
Troll SketchThis is an image for a fun little book project I was doing awhile ago and unless you just arrived on this planet you already know what the story is.
I had done another book project that was for a fractured fairy tale called The Three BULLY Goats. A cute little story where the goats were the bullies and the troll was kind and gentle.
I guess that led to me wanting to

illustrate another troll under a bridge with a goats story. I wanted to make an image that would bring a slight twist on the classic BILLY Goats Gruff tale and I thought that playing with the scale of the troll might make my piece more unique. I’ve always been puzzled when musicians re-make a well-known song yet fail to put their own artistry into the performance. I hope I can give this book freshness so that both adults and children can appreciate it.

CAN YOU TELL IF I PAINTED THIS TRADITIONALLY OR DIGITALLY?

Part of my process has always been to work from a warm tone over the entire surface – and then I add tone to the shadow areas. Weather I used acrylics, oils or an iPad or other digital devices, I would still go from a toned canvas, to toned shadows to to the finished piece.

I combined two different sketches to get it right. 

I combined two sketches because I was having a hard time drawing the Troll where I wanted him in one sketch. I used Photoshop to get it right…and the painting was also done in Photoshop. – Brushes that never run out of paint! Undo! Copy Paste! Endless Adjustments! Speed! No Shipping Costs!

A new look at an old illustration

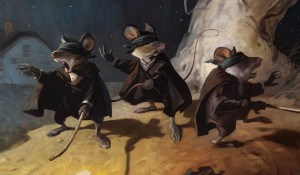
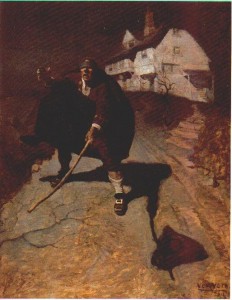
3 blind (pew) mice. A  new take on an old favorite by NC Wyeth called the Blind Pew.

0003 Jim M. 3 blind mice. A new take on an old favorite painting from NC Wyeth called the Blind Pew.
Artist Jim Madsen, (Wayne Andreason is his best friend) copied “Blind Pew” with a twist. He took an old favorite by NC Wyeth, the Blind Pew and put it to Three Blind Mice.

The Blind Pew ~NC Wyeth

NC Wyeth's illustration, the Blind Pew
Compare the mouse on the left and the house in the background. And the color pallet and painting technique. Although Jim’s is a digital painting. Way to go Jim.

FREE WEBINAR! 10 Step Digital Painting

FREE STEP BY STEP Digital Painting Webinar

 March 1, 2014 7:PM MST (mt. standard time)

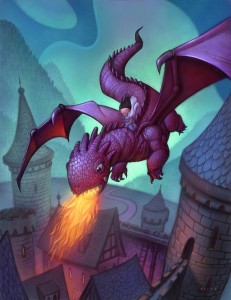
Dragon Rider

You know that feeling you got when you were 5 and you got to run downstairs on Christmas morning to open presents? Not to diss on past memories but WOW – I have that feeling again! I’m so excited to be able to create a lesson and share it with people all over the world! Our last webanar “How To Draw Everything” by Jake Parker gathered 879 people from countries on just about every continent – I even saw someone named “Penguin7493″ so… (Okay, maybe that wasn’t his, or her, real name… but then again, maybe it was)

How to, Step by step, Digital Painting Process FREE!

My ten step, how to paint, digital painting course webinar is absolutely free. And the video we make of the webinar is not free, but you can get a $10 discount if you act smart, I mean fast. Anyway, we have another webinar coming up on March 1st at 7:00PM MST and this time it’s my turn to share my digital painting process. I’ve broken it down into 10 steps. You know that old saying? The one that I’m about to butcher – “eating an elephant is hard unless you eat him one step or spoonful at a time…” or whatever but you get the point. If you learn to do something methodically it can not only make the task seem easier but also give you results you can replicate, and really, that’s what’s important right?

You can also purchase the video with added perks. 

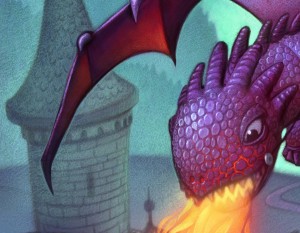
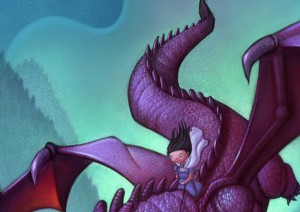
Dragon Rider 02
For those who decide to purchase the video recording of the webinar we’ve decided to throw in some extras this time (we’re learning). You’ll get 3 things: A PDF study guide with a verbal description of each of the 10 steps. A bonus video explaining in detail how to set up Photoshop to use the texture settings in the brush pallet and my FULL Photoshop painting with over 30 layers from sketch to finishing touches. This is a high res file over 300 mb  – my working file so you can deconstruct the Dragon Rider and see what she’s really made of. Don’t be dissapointed if you don’t find any bones or entrails. Use it as your own working file to replicate my layers if you want to. This is a great way to actually see how someone paints in Photoshop.
DragonRider 03I realize that many people will think I’m crazy for letting my artwork get out there to be used by anyone for any purpose. I think most artists get a little too attached to their work and subsequent self importance. In the end it was 25 hours having a blast doing exactly what I wanted. If someone makes T-shirts out of it in some other country good luck – send me a picture of all the cash – that’ll put a smile on my face! And send me a T-shirt while your at it. I take a size “pretty freaking big”.
Pre-Order the Video & save $10 – The Webinar is FREE
It is absolutely FREE to attend the webinar, but if you would like to pre-order the video, PDF, Bonus Video, and Dragon Rider Photoshop file, you’ll get a $10 discount using coupon code “10step10” – but this will expire the end of the day of March 1 – check out the details in our store.
DragonRider 04
So you need to get registered for this event in order to be sent your individual joining link from GoToWebanar – simply click here and follow the instructions! See you soon!

A Little Art Assignment With PhotoShop

A Little Art Exercise with Photo Shop

Digital painting class –

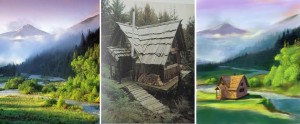
Rules: Use Photoshop – add a cabin and appropriate lighting for the landscape – one brush – one layer – no tracing – no undo – no eraser – no eye dropper – no tools other than the brush – paint too dark? tough – paint light values over your mistakes.

Give yourself 3 hours… GO!

cabin assignment


-Cost: Free, just do it.

-Consequences: Learning……the groans and moans will be worth every penny! 

HOW TO MAKE A STORY APP (for iPad) – STEP 5.5

How To Make A Story App – Step 5.5

Finish the artwork.

(for earlier steps scroll down or click the following links)

How to Make a Story App – Step 1
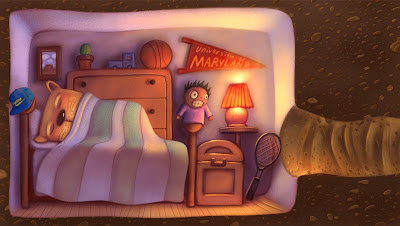
Scene of Gary in his little house.

Shoooeeeee – that took a while! But it was worth it… I hope.

I’m not going to even try to explain how much fun I’ve had with the art work in this story app…like…nope…not going to even try. But Hey, I had a LOT of fun.

Of course it has been an incredible commitment and sacrifice. Lots of work with little or no guarantee of financial reward. I even had to turn down PAYING work and slack on my duties at FolioAcademy to have enough time to work on it – which will cause some to question my sanity. But those same people will probably say it was a good move if this pans out financially.

Do I suffer form insanity? Nope, I enjoy it.
Show me any thing of value in this world that didn’t come with some crazy idea and a lot of sacrifice? For me the journey is worth it alone. I’m content because I’m seeing my idea come to life. How many people can say that? Will it make money? We’ll find out as I plan to publish all my sales figures right here on this blog. Get ready to say, “I TOLD YOU SO!”This week I’ll be adding text and finding sounds…
Now available, Step 6.

How to Make an App – Step 5

How To Make A Story App – Step 5

 Adding color using Photoshop!

Design it all before you start to color it. First things first.

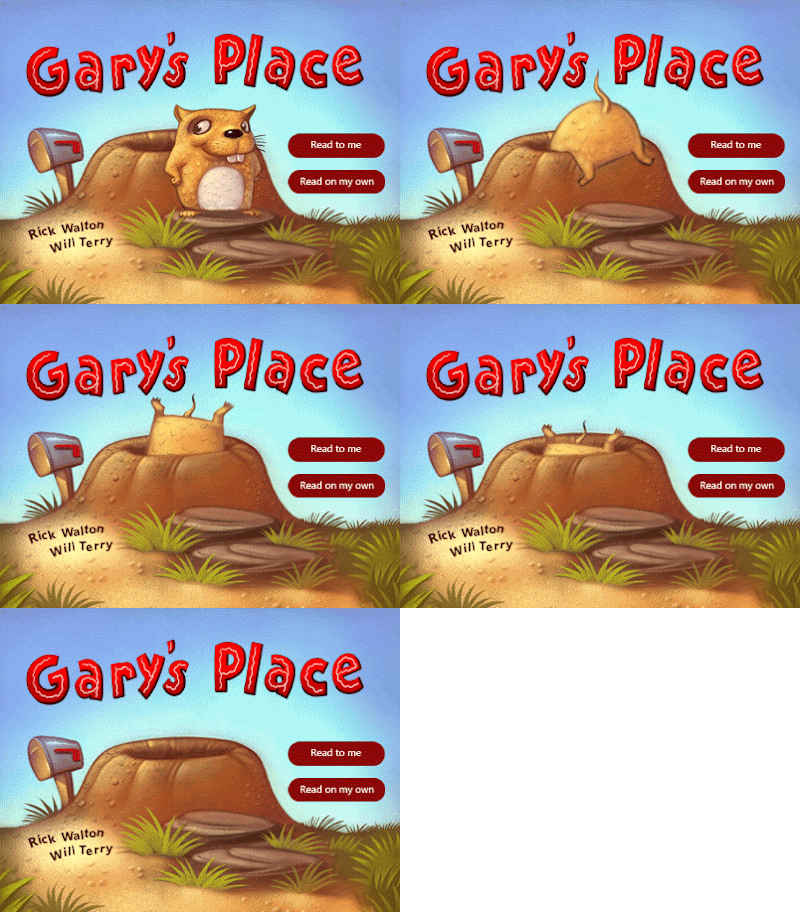
Making progress! I have the opening screen finished! I’m now adding color to all the pages. This step is going to take me a while so don’t think that I’ve quit if you don’t see step 6 for a few weeks. I had to make sure that every screen/page was working with the story and that the animations made sense. The last thing I want to do is start my finish work before the framework is in place. It’s much easier to alter a sketch than a painting and if I were doing this 10 years ago (even though there was no such thing as an iPad) I would have most likely started on the color before I was ready.

So the way it will work is that the user will be prompted to touch Gary at which point he disappears into his hole and hopefully entices the user (kiddy) to want to know where he went and what it looks like down there.

If you’re new to this blog you can scroll down to see my first steps on this journey – and I haven’t forgotten that I plan to share all my stats with you when I put this baby in the app store. (Cross your fingers) I’m always so curious to know how other people’s apps are doing – but nobody shares that info – like it’s classified or something…think of me as your own personal Eric Snowden – I’m going to leak all the intel on my app – good or bad – we’ll all see how it does.

I’ll be making my app with Kwik – the DIY Photoshop plugin that allows a non-programer to create their own code behind the scenes of this wysiwyg. Our Kwik class starts tonight – can’t wait!

Check back for step 5.5. coming soon, I hope. Thanks.

coming November 8, 2013

Starving Artist Trades Art for Food

The Food Network Show, one of my Favorites. 

What would you do for a Free Lunch?

 
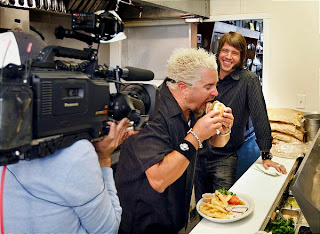
So my son Aaron and I were watching the food network show – Diners Drive-In’s and Dives and we just happened to catch the episode where they featured the Blue Plate Diner in Salt Lake. We both love Guy Fieriand when we saw him interview the owner of the Blue Plate, Johnny Chopper and saw the love and attention to the food we both knew we had to go.

Will(‘s) work for food. God Bless. 

So we googled the Blue Plate and put it on our “to do” list. One day when we found ourselves downing some Blue Plate goodies, Johnny Chopper just showed up and my son says, “HEY Johnny Chopper showed up” and so after the meal when we struck up a conversation one thing led to another and yada yada I walked out with a trade agreement – food for art – I highly recommend it….the food for art thingy….and the Blue Plate.

The Idea

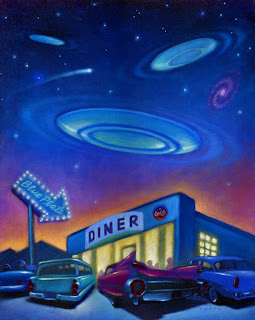
So I told Johnny I would send him a sketch of an idea I got while stuffing my face with his food. I just thought it would be cool to do this painting of a blue plate that might be a flying saucer but might only be a blue plate flying in the air – perhaps someone threw it like a Frisbee (a satisfied customer of course) but I wanted to keep it ambiguous.

Adding Elements, using the net and Photoshop 

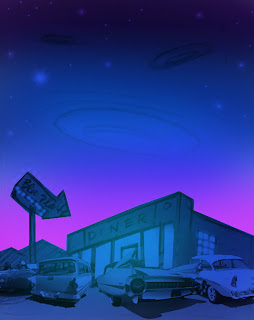
After he saw (and dug) the sketch I wasn’t happy with the way the cars were in front of his place and even though you can only parallel park I thought It would look cooler to have all the cars pulled in. So to make my job easier I just nabbed a bunch of cars off the net like the one above and tossed them into the sketch using photoshop.

Next step, Make it Grey and Use Your Own Color

After I got all the cars distorted the way I wanted them I changed the mode to grayscale to get rid of all the color. This allowed me to not only add my own color but with the distortions texture and color changes I’m safe from copy right infringement. Next I printed this out on watercolor paper and added texture to prepare it for acrylic paint.

and oh, this car was in there too

Here’s another car that should be up with the Cadillac but since I put it in the wrong place and don’t know how to delete and move it you’ll have to imagine that it’s up with the other one.

Finished Painting

And here is the final painting – It was a fun diversion from my regular workload. If you are interested you should know by now that we teach all kinds of art stuff at FolioAcademy, art lessons online.

Another Satisfied Customer

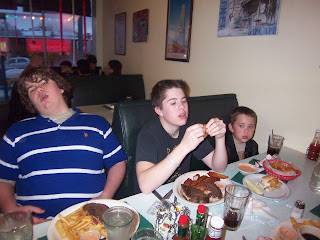
So I loaded the fam into the car and we headed for Blue Plate heaven to deliver the painting. I am not a starving artist as you can see, that’s me on the right. Maybe it’s because I am willing to work for food. I should paint a cardboard sign that says that. I could stand outside of Wall Mart and get all kinds-a gigs.

The Fam is no longer Famished 

It’s funny how enthusiasm for food changes in about a half hour – while waiting for your food to arrive it’s sometimes hard to maintain your train of thought as you struggle to control salivation – after you’re stuffed you’re wondering what you were all psyched about? Well now we have a bunch of gift certificates and we can enjoy Blue Plate whenever we’re up that way. YAY Blue Plate!! “Best dad EVER!”