Category Archives: Will Terry
Folio Academy has teamed up with Kwiksher for a limited time.
Get Four of Folio Academy’s video training courses FREE when you purchase Kwiksher.
Bring your interactive stories to life, without code. Creating your own apps can be fun and fulfilling and now anyone can do it with Kwik 2 at kwiksher.com.
What is Kwiksher? The best way to create mobile apps from Photoshop!
click below to See Kwik in action.
Improving Your Work, Training with the Best
Alex Souza, the founder of Kwiksher says, “I am a believer that there is always space for improvement (in our lives, skills, and so on). Of course this applies to Kwik made apps.”
Quality is one of the top reasons for successful positions into store rankings.
Thinking about that, I partnered with Folio Academy and Will Terry, one of the top children’s book illustrators in the world, to provide quality instruction to anyone willing to improve illustration and painting skills with Photoshop.
Will’s life’s goal was to become a children’s book illustrator, and to date, he has illustrated over 25 children’s books with great publishers like Scholastic, Random House, Leap Frog, Houghton Mifflin, Dial, Albert Whitman, and Simon Schuster.
I am really a fan of what he is able to do and I believe everybody will get great insights from his blog.
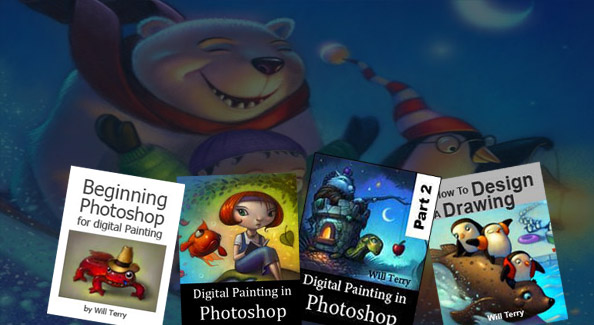
Every new Kwiksher customer (till end of April) will get the following four training videos for FREE.
Every Kwiksher customer can get a 50% discount (till end of April) on the following four training videos by Will at Folio Academy. But even better, all new customers who purchase Kwik 2 at Kwiksher.com will be given, all four of these wonderful lessons. ~Alex
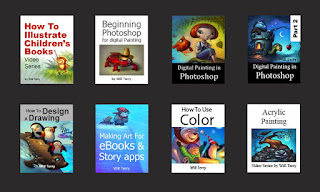
- How To Design A Drawing: explains what it means to design a drawing as well as an introduction to the design principles and elements. Honestly, I wish I had this information while in college;
- Beginning Photoshop for Digital Painting: developed for the beginner who has never used Photoshop;
- Digital Painting in Photoshop: will be shown all of the settings, controls, and the relatively few tools will uses to create digital textual colorful “paintings”;
- Digital Painting in Photoshop Part 2: demonstrates how to take a sketch to finished piece step by step;
Together, these tutorials cost US$100 so, don’t miss the opportunity to get them with the discounted price.
PHOTOSHOP DEMO FOR MY CLASS
Photoshop is an amazing program!

PROCREATING! ER UM…CREATING IN PROCREATE
I created this image using Procreate on my iPad – I love this app!
I just got back from the SCBWI Southern Breeze conference in Atlanta. I was being entertained by Dianne Hess (editor at Scholastic) as she gave her speech – an inside look at her company. I have to draw to listen so I was on my iPad using “Procreate“. It’s my go to program for creating all of my sketches now – I love the screen rotation feature and the larger file sizes. Oh yeah – and I’m still only using my finger. I find it fascinating that it bothers people that I won’t go out and drop coin on a stylus. It bugs my students, friends, and strangers that I meet – like the guy who sat next to me on the plane. “You know you can buy all kinds of styluses for that device,” he informed me…I just agreed….by the way it strengthens my resolve to run sans stylus with each criticism.
A special shout out to Elizabeth Dulemba for inviting me to speak, being a great host, running an awesome conference, and being a great illustrator. I met so many cool people down there – too many to list but you know who you are! I hope to be able to get down there again sometime.
CRAWL, WALK, RUN, LEAP!
I created the image above for my digital painting class this semester as an example of what I want my students to do for our “circle straight edge” assignment.
The rules:
- Create an image in Photoshop.
- Perfect your drawing.
- Use only the circle selection tool and the lasso for straight edges.
- Painting: use the paint bucket and airbrush tools.
- Concept: Visually explain why the Abominable Snowman is grumpy.
I don’t think everyone is happy with this assignment. The limitations are frustrating some of them (yay!) and locking them into a style they aren’t excited about.
My philosophy: Mastery in any discipline such as science or sports – arithmetic or art is gained in small steps.
You have to learn algebra before calculus – physics before string theory and lay ups before alley oop dunks. By taking away options I’m allowing students to focus on the basic elements of design and visual communication. If you can’t develop a solid composition and execute good rendering under these restrictions how can you hope to succeed given unlimited brushes, selection tools, textures, healing brushes, filters, adjustments, mixing and blending tools, etc?
Imagine the following experiment: You are given the best brushes and pallet knives money can buy for oil painting -fine linens, mediums, easel, pallet, etc. Your set up is perfect. Then give someone like Caravaggio a pocket knife, an old tree branch, some cheap oil paints, and a crappy canvas board. Set up a still life. Do you think you could out paint him? I know I couldn’t.
It’s not just about the tools – it’s about your understanding of mediums, surfaces, tools, design, light & shadow, edges, color, value, texture, line, space, shape, etc. What you do with the tools is personal to your understanding and vision.
Try limiting your choices…wax on – wax off.
In addition: From the mouth of Kazu – the artist who just completed the new Harry Potter covers: “Anything else about your process as you went about it that artists should know?”
I tried to work on a single layer in Photoshop. I used very few effects. All of the illustrations for the most part I didn’t separate elements. I tried to keep it pure as if I was working on a canvas. I forced myself into a limitation despite having all of these tools at my disposal. (from CBS)
New Ways To Market Your Illustration
There is still plenty of freelance illustration work out there.
You and I can find success in many different places.
CAN PINTEREST HELP IMPROVE YOUR ART?
I must think so or this would be a really short post right?
I will show you how to find out what people think of your work.
For starters lets deal with that title – what if I told you that there is a way to see how your art stacks up against your competition? What if you could be that fly on the wall in the office of an editor, art director, agent, or fellow artist? What if you could know what people really think of your work? I’ll show you a very simple way to use Pinterest to do just this.
1. Make your own Pinterest account
2. Type a Key word in the “search bar”.
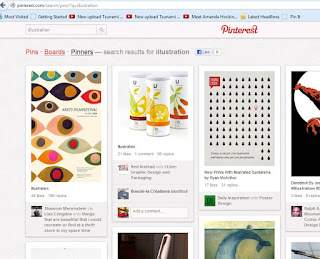
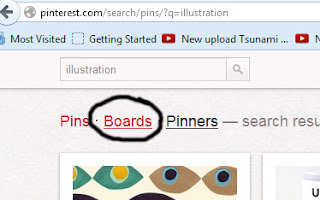
3. Click on “boards”
4. Click on a piece of art that interests you.
 …make sure you REALLY like the images you’re re-pinning. These need to be images that you really admire and perhaps wish you’d created so be picky! Also – if you don’t pin really good stuff people will ignore your board and that will kill this whole experiment.
5. pin one of your own images.
Now pin one of your own images and then throughout the next year or so, repeat this ratio – a handful of other artist’s images to one of your own. I suggest you pin from your website or blog so that if people click on them they come back to your portal – but that’s not what this post is about. (You should still do it for marketing reasons.) There’s a way to download some thing-a-ma-jig to your browser so you can “pin” from any site – I don’t remember how I got it to work, you could ask a snail. I think I googled “how to pin with Pinterest” or something like that. I need one of those snails to do that stuff for me.
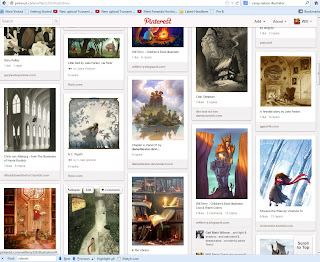
6. Below is a look at my illustration board on Pinterest. If you go there or zoom in, you can see how many times each image was “re-pinned”, or not re-pinned. – and here in lies the magic! You get to see how many votes or “pins” each image gets including your own. In a way people are casting their votes in an impartial way – self serving! They see something they like and they re-pin it for themselves. This is more valuable than a critique from friends in some ways because it’s a rather large sample size and it’s honest. The people pinning don’t really know or care that you’re looking at the data this way -they’re just grabbing images for future consumption on their own boards.
So how can Pinterest help you improve your art? You can learn a lot by seeing what people like and don’t like. If you’re work isn’t getting re-pinned as much as the other work you pin you have some work to do – but not in the blind – because you can see exactly what images people respond to the most. You might want to make a list of the things the popular images have in common – then compare to your work. However, this could also be a little dangerous if you follow it too closely and copy what is getting votes – you could become a follower- you still have to innovate but in order to create great art you have to consume great art!
Pinterest is in my opinion a very valuable tool for inspiration, strategy, and marketing – I’m starting to get emails and messages from customers who are finding me on Pinterest – and I hear it’s the fastest growing social network! so get pinning!
Folio Academy Student, James Horvath, Gets an Art Gig
It all started with Will Terry’s first art lesson video course
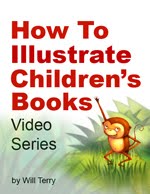
Words can’t begin to describe the feelings I’ve had over the past few years since making my first video tutorial: “How To Illustrate Children’s Books”. I’ve received hundreds of letters, emails, Facebook messages, etc thanking me for making that video and the subsequent videos I made afterwards. I get to chat with people everyday about their enthusiasm and renewed energy for working on their art projects. I find myself wanting to produce more and more video courses for my students around the world.
James Horvath shared a wonderful thank you letter and a short success story.
With permission from James Horvath I’m sharing his letter because it really touched me yesterday – I’m glad I was home alone so my kids didn’t see me get all mushy. My emotions come from the leftover feelings I have growing up in the shadow of academic over achievers in my family and thinking that I would never be able to do anything important with my life. There really isn’t anything better in life than knowing you make a difference – so I thank all of you for the kind words you’ve sent me in the past few years! ~Will Terry
Hey Will
It’s been a while since I downloaded and watched your video series, “How to Illustrate Children’s Books“. I just wanted to write to you and let you know how well your course has worked for me.I’ve been a freelance children’s illustrator for many years. I worked primarily in the education market doing work for Scholastic, Pearson, Houghton Mifflin Harcourt and a few others. And while I’ve enjoyed some modest success, I always wanted to write and illustrate my own children’s picture books.About a year and a half ago I decided to get off my butt and actually do it, instead of just dreaming about it. I found your video course online and decided to spring for the $29.99.I developed my story, worked on some sketches and sample art, basically, followed your process and submitted my dummy (an email with a PDF) to one publisher. A test run so to speak. I braced myself for the almost inevitable rejection that I was sure would soon follow.Instead, within 24 hours, I received a response with a very enthusiastic reply. That was on a Tuesday. By the end of the week I had a 3-book deal with HarperCollins Publishers. My first book comes out on April 30th. And is up for pre-orders at practically all major on-line retailers.I just wanted to send you this note and say, “Thanks”. I really do credit you and your course with outlining a path for my success. I would, and often do, highly recommend your video series to anyone looking to break into the children’s book market.Thanks again!James Horvath
Congratulations James
Painting with Cool and Warm Colors
Warm Light, Cool Shadows add to a beautiful Contrast
I painted this as a demo for my digital painting class this semester at UVU. I really wanted to play around with a dramatic lighting situation.
Get inspiration from the real world.
One of the reasons I’m a big advocate of getting out there and seeing the world with your own eyes is the feeling you get and the inspiration to find a place for it in your work. I woke up to this last year in Utah’s Goblin Valley last year Needless to say, I was inspired. – my tent was about 5 feet to the right.
So this is how I begin my sketches on my iPad.
I call this the ugly stage. I’m basically making a “map” for me to trace and perfect on another layer. At this point I don’t care about detail – just the raw elements and proportions. It’s sketchy and loose but it will serve as my guide.
Use “Procreate” for a larger file size, plus you can rotate your “paper”
I’m using “Procreate” now because I can have a much larger file size then “Brushes” – AND – I can rotate the “paper”. That’s a huge improvement. Down side: (why is there always a downside?) It’s much slower than brushes. I’ll be making an update video for my “Painting on the iPad” video tutorial that demonstrates how you can use Procreate for your workflow.
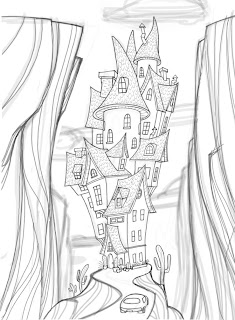
And this is the perfected sketch. I probably used about three more layers to get to this point reducing the brush size and increasing the value of my lines.
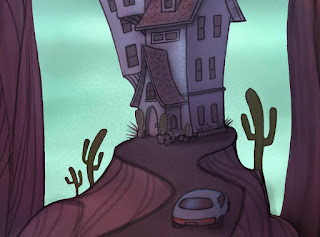
I think it’s really neat to look at this part of the painting because it looks so dark and different than the part in the sunlight…similar to the photo I took. I added the color in Photoshop CS5.
I love light and shadow.
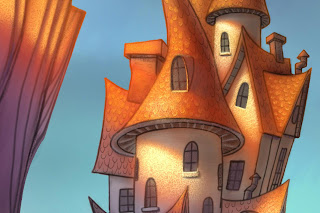
You really can’t have one without the other can you? I really like exploring with cool colors vs warm colors to see what interesting blends happen and the mood it creates.
an Oily Start with a Photo(shop) Finish Digital
Started an oil painting and finished with photoshop
Start you piece traditionally to get a painterly look.
One of the problems with digital painting for a lot of artists is that it’s often hard to get the subtleties and happy accidents that traditional mediums provide.
One of the problems with painting in traditional mediums – like oils for instance is the lack of control or the tedious nature of finishing details – not to mention the fact that you can’t undo, adjust color, or zoom in.

