Monster App Artwork & Illustrations in Color

Monster App Artwork in Color

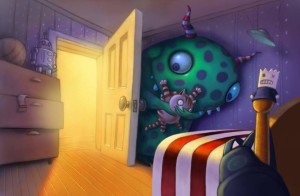
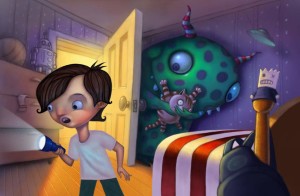
Finished Illustration of Monster Hiding in little boy's bedroomI am drained from working til 3 am so many nights in a row on this piece and even later last night. I thought I was done but when I looked at it again the next morning I realized there were quite a few more tweaks needed – I stopped having fun with it there for awhile. – Three hours at least and I think that’s when I was finally done. ..again! Success usually depends on what you do in your spare time.
I had to include several versions with various assets on different layers because there would be animations in this app.  I wanted to have animation but didn’t know how to do it or set up for it but hoped that someone would come into my life to help me. Well, it happened – I teamed up with a Disney animator and he is going to be teaching me and working with me to make this project happen! Kind of the, “If you build it they will come” model.

Don’t want any unnecessary animations

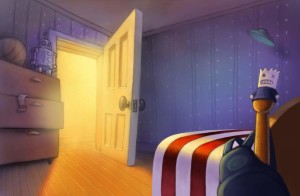
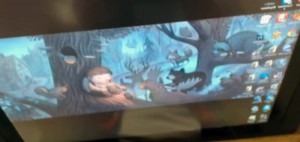
I am not interested in programming superfluous animations in my e-book.  One thing I’m constantly seeing in e-books and apps is animation and/or sounds that don’t move the story forward – in fact I’m guilty of that in my Monkey & Croc ipad app. On this one I wanted to create a story/interactive e-book that couldn’t exist in physical book format. Part of an on going exploration of this technology. It’s fun to think about the future and how I’ll feel about all of this ten years down the road, lessons learned, bumps, bruises, and hopefully a few smiles….ok, a lot of smiles!bedroom without monster or child for app

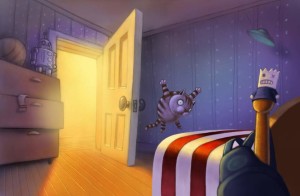
bedroom without monster or child but with cat for app

bedroom with monster without child for app

Illustrating a Picture Book: an e-book & an App

Sketch for my MONSTER book

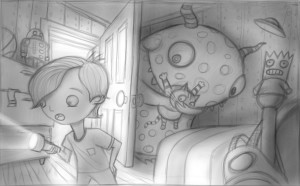
Illustration black and white sketch, of a monster in a bedroom

Here I am, working on a new picture e-book and I thought I’d post one of the sketches – it’s a bit rough but they all start out rough and I’d like to post some work in progress as I get going on it. This will be another e-book that I will finish down the road. I say down the road because I know this one is going to take much longer than the other ones I’ve produced in the past. I’ve decided to gamble more time in order to produce a final product that I feel is worthy of long term recognition. Illustrating children’s books is still probably the funnest thing on earth next to sneezing nine times in a row (my personal best) and when I’m working on one like this -time seems to move x ten. Yes I have allergies and I am allergic to whatever we have going on around here.

iPad painting, with my Finger

iPad Painting; Finger Painting on the iPad

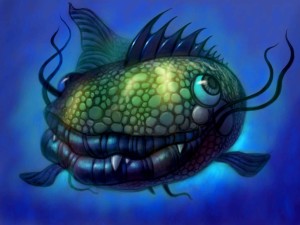
finished pic of a strange fish ipad painting by Will Terry

Complete with color.

iPad Painting is too fun. I’m having way too much fun with the “brushes” app fro painting on the ipad. I painted this at a doctors office and in the car waiting for my son and a little while watching old episodes of “The Office” on NetFlix with the fam. My favorite Michael Scott line: “Would I rather be feared or loved?…I want people to be afraid of how much they love me.”


iPad Painting & the lack of Pressure Sensitivity

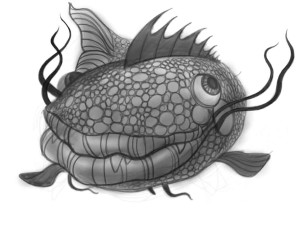
ipad painting/sketch of the strange fish by Will Terry finger painting

Black and white finger painted on the iPad

But back to ipad painting – while the touch screen leaves many to complain about the lack of pressure sensitivity I find that an easy work around is just lowering the opacity to almost zero and making lots of little strokes. I love the portability and the fact that I can use it with or without a stylus. Like the title of this post suggests – I never used my stylus to paint this image – only my finger. I was surprised that after a while my finger did actually get a little tender but was fine the next day. My goal was to see how far I could take a digital painting using only my finger. I guess you could say I gave my ipad the finger :)…in a good way. I think I still like it better with the stylus.  With the ability to zoom in and out so quickly – fixing and smoothing line work was a snap.

The iPads are still wonderful fo digital painting

I still enjoy digital iPad painting however I feel that the perfect tablet for me would be about half again bigger than the this ipad size. And pressure sensitivity would be nice too. I think there are better ways to paint digitally but this works. As more and more artists and especially illustrators are switching to digital painting, there are more and more devices and apps and programs to make it even easier. I love it.

For art lessons online, be sure to visit FolioAcademy.com  :)


Scanning, Re-Sizing, Resolution, & Pixels in Photoshop

Getting the size and resolution right in Photoshop

This is mostly for beginners but a valid subject.

Scan your art or sketch and work in Photoshop to finish, paint or add color.

For those who sketch or start their artwork on paper but like to work in Photoshop

This is a question that we still get a LOT, so we want to address it.

Step by Step 

Scan your sketch or artwork into Photoshop at 150-300 pixels per inch.

Make sure Constrain Proportions is checked

Make sure Resample image is checked.

Set your pixels per inch to 300 pixels per inch.

Decide what size you want the printed piece to be and set your size. I.E. 8”x10”

There are a few things to be aware of when sizing a piece in Photoshop.

Get your Height, Width and Resolution right.

Get it into Photoshop and go to image then image size and just look at it.

Go down to Resolution in the Document Size area and see what you’ve got. If it says 150 pixels per inch, then that is how many pixels equals 1 inch in the resolution of your painting. Above the RESOLUTION there are the two Width and Height boxes, you want those in inches not pixels, so change that if you need.

Above that there are the Pixel Dimensions, this is the total number of pixels, not pixels per inch but per the entire piece. Set your width and Height to Pixels.

Make sure Scale to Style, Constrain Proportions and Re-sample Image are all checked. Like so.

Pixel Dimensions

Width      [big number]           Pixels

Height     [big number]           Pixels

Document Size

Width         [     8.5     ]            Inches

Height        [    11       ]            Inches

Resolution  [    300     ]          Pixels/Inch (Pixels per Inch)

[ x ] Scale Style

[ x ] Constrain Proportions

[ x ] Resample Image

Printers and publishers usually want everything to be at 300 pixels per inch.

They also want it to be so many inches, like 8×10″ for example.

You want your illustrations to look good. So…

Increasing the Resolution does not increase your resolution.


Set the parameters and get the scale right in Photoshop

Now that you are working on your sketch in Photoshop, you want to set the parameters and get the scale right.

Screen resolutions is about 72 dpi, (Dots Per Inch, or Pixels Per Inch)

There is nothing you can do to increase the actual information that you have. If you take a small picture scanned in at say 75 DPI and blow it up, it won’t give you ANY more detail. Like a projector, if you back it up and make the image on the wall bigger, the image will not be any more clear, just bigger. So Ideally, when you work, you want your finished piece to be big and clear, you can always make it smaller. Don’t go too big it takes longer for your computer to render.

If you have an 8×10 piece scanned in at 150 and you just change your Resolution to 300, it doesn’t actually change the resolution of your work and leave all the other parameters the same. It will decrease the size of your piece.

The reason I set my scanner at 150 instead of 300 is because I don’t need too much detail to go from a sketch to a finished piece, so I scan it in at 150 then change it to 300, then I work in 300 dpi so my finished piece will be acceptable for the printers, and it will have the detail and clarity that it needs for the size that it will be printed.

So you want your width to be the right size for the printer, say 8 by 10”.

You want your resolution to be 300.

Now you can zoom in on your work and zoom out without changing the end size or resolution.

Make sure Constrain Proportions is checked. 

[ x ] Constrain Proportions wants to be checked so that if you change the width, the height will change proportionally and vise versa. If you want the width wider but want the height to stay the same, if you just change the width, it will skew your art, so it would be better to keep your proportions, so you should just size it bigger and cut some off.


MAKE SURE resample image IS CHECKED.

[ x ] Resample Image is important so that if you change your work from 150 pixels per inch to 300, it will boost your actual pixels per inch as well. Otherwise, with Resample image unchecked, you could change your work from 150 to 300 Pixels per inch and  size of your work will drop to compensate for the change. Now when you go to ship that finished work to the printer, your 8 by 10” piece will be more like 4 by 5”, and that is not good. You Cannot just make it bigger with out making it all pixilated and blurry and crappy.

What a publisher wants

Most publishers want your work to be at least 100% of what they want to printed piece to be. 8-9” by 10-11” and at 300 pixels per inch.

 Have fun with it, explore. 

Fool around with some of these and see what happens to your image and the other perameters when you make changes with Constrain Proportions and Resample image checked and unchecked.

The danger is that you can be working along and not realize that your pixels per inch or your resolution or your document size is way too small until you are finished. And that is a painful lesson. Ouch!


for more info on this same thing, watch this video by Will Terry.
Drawing & Painting on iPad Demo using Procreate & Speed Painting

Artist Demo on iPad using Procreate and a Cheap Stylus

Working From General to Specific I start by Roughing it in

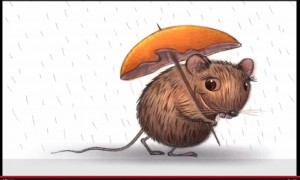
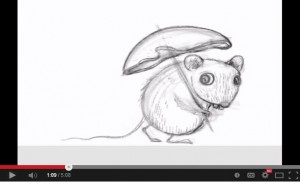
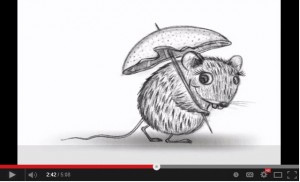
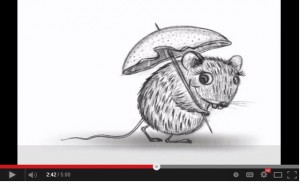
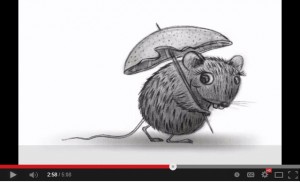
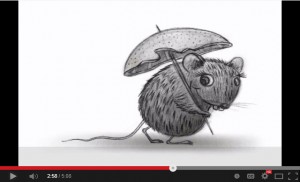
Rat with an Orange Peal Umbrella

Last week I mentioned that I “found the perfect Stylus” and I showed you a few steps and told you to work from general to specific, as I was taught by my friend and mentor, Robert Barrett. AKA Bob Barrett.

This was a little 2 hr drawing, of a Rat character that I did in Procreate. I had this Idea to draw a little rat that made made an umbrella out of an orange peal and a tooth pick.

Video below for Artists who hate to read

If you are like me and you don’t like to read. I get a lot of questions about my process so I thought I’d do a little demo, in fact if you scroll to the bottom you can just watch the video. It’s a speed painting but I talk it through.

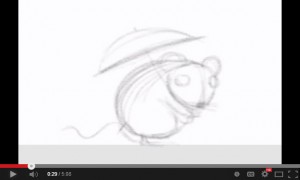
Start your drawing by blocking in your sketch

000 Wet Rat 02 000 Wet Rat 03

I always start by blocking in the basic shapes. I’m on my iPad right here, if you saw last weeks post, you may remember that I use a real cheap Targus stylus pen, stylus that you can get for about $12.00 at Target or Walmart. I like the blunt tip, as I like to block in the basics to start.

But what about detail? Keep reading.

Add Detail with a blunt tip by Zooming In

000 Wet Rat 05 000 Wet Rat 06

What you won’t see in these pics or the video below, is that I am zooming in to add detail. If you get the basic shapes in first, you don’t need to worry about ruining it by adding detail too soon. Plus, zooming in to add eyelashes and fur and stuff and I am putting it in the right places as the basic shapes are there. So when I zoom in, I still know where I am.

Work the entire picture as you go for a constant look.

000 Wet Rat 07 000 Wet Rat 08I don’t work one spot to completion but rather, I go over the entire picture over and over again. As I add fur, I do it all over then add a little more, then work something else, like more fur, shade etc. Bringing the entire sketch, slowly to a more finished look. Not staying in one place too long. This also helps you get a consistent feel throughout the entire painting. This way I am happy with it before I dive into the detail. General to specific I tell you. Bob knows his stuff.
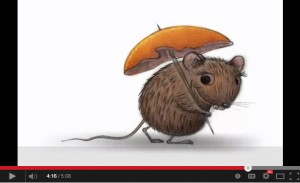
I use a few layers but not a lot.

000 Wet Rat 09I used three or four layers on this drawing. Then I flatten them down. And maybe add another layer, so I can edit new stuff before I flatten it down again. I like to use a new layer when I start on another area. That way you can edit as you go. After I get the drawing complete, more or less, I can add color. Note how I add color to the whole piece 000 Wet Rat 01then move to some more color. Once the value and basic color is in place, I work some more color. Shadows and highlights.
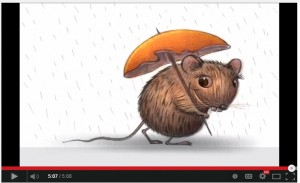
This is not how I usually Paint, but… 

Warning! there will be a few adds here and links our website store. 

On my children’s books and bigger illustrations, I work differently. I might get started on my iPad then move it to my desk top and use my Cintiq monitor or Wacom tablet and Photoshop. I would add the color there and add the detail later. Probably because of the size of the full spread files and what not. I am finishing this one in Procreate for demo purposes. One of the cool things with Procreate is that you can export your video, going into tools while in your drawing, export it, like to Drop Box and it sends out a little MP4 file. There I can work faster, esp with the Cintiq monitor. Plus I can get the texture that I really want. I like the Progreate tools but I prefer the Cintiq monitor or Wacom tablet for adding the detail and color.

When I Illustrate Children’s Books, I Use my Cingiq Monitor.

If you want to see more on that, you can find tutorials on FolioAcademy. There are a lot of digital video courses, like for Photoshop, How to illustrate children’s books, how to design a drawing and a lot more. Here is where you can find my courses and you can also choose from a lot of other artist instructors.

iPad Speed painting Demo Video using Procreate & a cheap stylus


I Found the PERFECT Stylus For Drawing and Painting on iPad – Procreate App

Finaly! The Perfect Stylus For Doing Your Art on iPad

ARtist, Will Terry used to use His finger to create art on his iPad

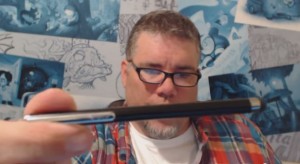
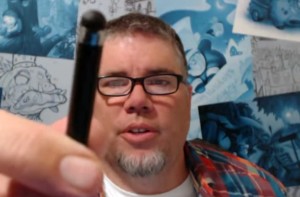
Will Terry displays his favorite stylus

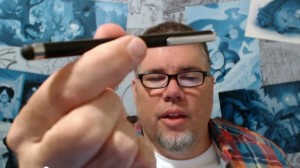
I use a fat bulbous stylus

I have found the perfect stylus for drawing and painting and doing all that digital artwork on my iPad. Using a Procreate drawing app. I used to use my finger, in Photoshop and in Procreate. As you know, the best stylus is the one you have with you and you should always have your fingers, or at least one of your fingers with
you. I have changed my mind since I’v found this. See the pictures.

How can this bulbous pointed thing be a good stylus?

000 Stylus 02But when you draw with something blunt like this, you are less likely to get that into detail too soon. Like if you are painting, William Whitaker says you should go for the biggest brush you dare to use and then grab one a little bigger.
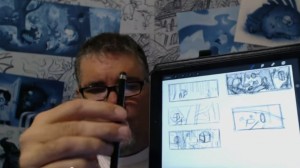
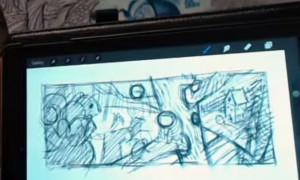
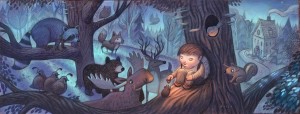
So with this bulbous, fat, blunt stylus, I just start drawing.

Artist Will Terry displays a few sketches on his iPad

See sketches there to the right.

I first come up with a few sketches, doing all my initial design for my images with the fat stylus right on my iPad or on my Cintiq monitor.


I turn my design into a composition.

Composition on an iPad

My Simple Composition

Just like when you paint in Photoshop, you want to start with huge clunky brushes. All the realy great Photoshop artists use a big brush in Photoshop.


Then Work the Composition into a Painting

Digital Painting by Will Terry

The comp there, became THIS Painting which I just finished on my cintiq monitor. You may remember it from a previous post. See it here on my Cintiq monitor as well.

000 Stylus 06So when you are painting, Start with a big brush and when you are painting digitally, start with a big stylus like the one I use now instead of my finger.


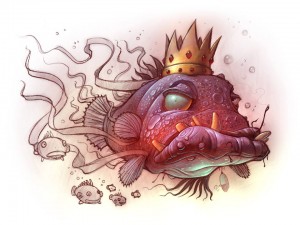
This Fish King Painting was done with the fat Stylus

King FishThis Fish King Painting was done with this stylus that I displayed above. You may remember it from a previous post.

You can spend over $100 on a stylus

I am asked here at FolioAcademy,  ALL THE TIME, Will, What stylus should I get? What is the best one for me? Which one are you using? Should I get the one that has a little plastic tip? Or one with pressure sensitivity or virtual pressure sensitivity. (I don’t know about that, because it may be for you if your painting style requires some of that, and that could be a good one).

OK it may not be the very best Stylus, but it’s the best for me. 

000 Stylus 08

OK I admit I said I found the best stylus but I have to admit that it may not be the best for you. It probably is, however, you may be light years ahead of me and using one of those artsy, schmancy, pressure sensitive, new fangled,  expensive, high falutin types.

For me, the $12.00, blunt tipped, stylus you can get at Target or the basic store. I think I spent $12.00 on mine. And if and when it wares out or gets lost, I am not out a whole lot of money.

 Paint and Draw from General to Specific, Digitally and Traditionally

So to recap, you should know this already but if you don’t, you should start rough, and work from general to specific. That was drilled into us at BYU by the Dean of the Illustration Department, Robert Barrett, and he was right. After you get your painting blocked in, or your drawing roughed in, then you can go in and start picking out, or putting in, the detail. So many paintings are ruined because the artist starts noodling it to death and working on detail when the basic shapes and design are still not worked out or defined. In a word, use a fat stylus.

I will post a demo next week of a sketch to a nearly finished piece.